
How to Import Transactions in L’tax
This guide walks you through uploading your sales transactions into L’tax so the platform can automatically calculate VAT or Sales Tax. Before uploading transactions, you need to complete two preparatory steps — adding your store and registering your tax number. If you have already done this, you can skip directly to Step 3.
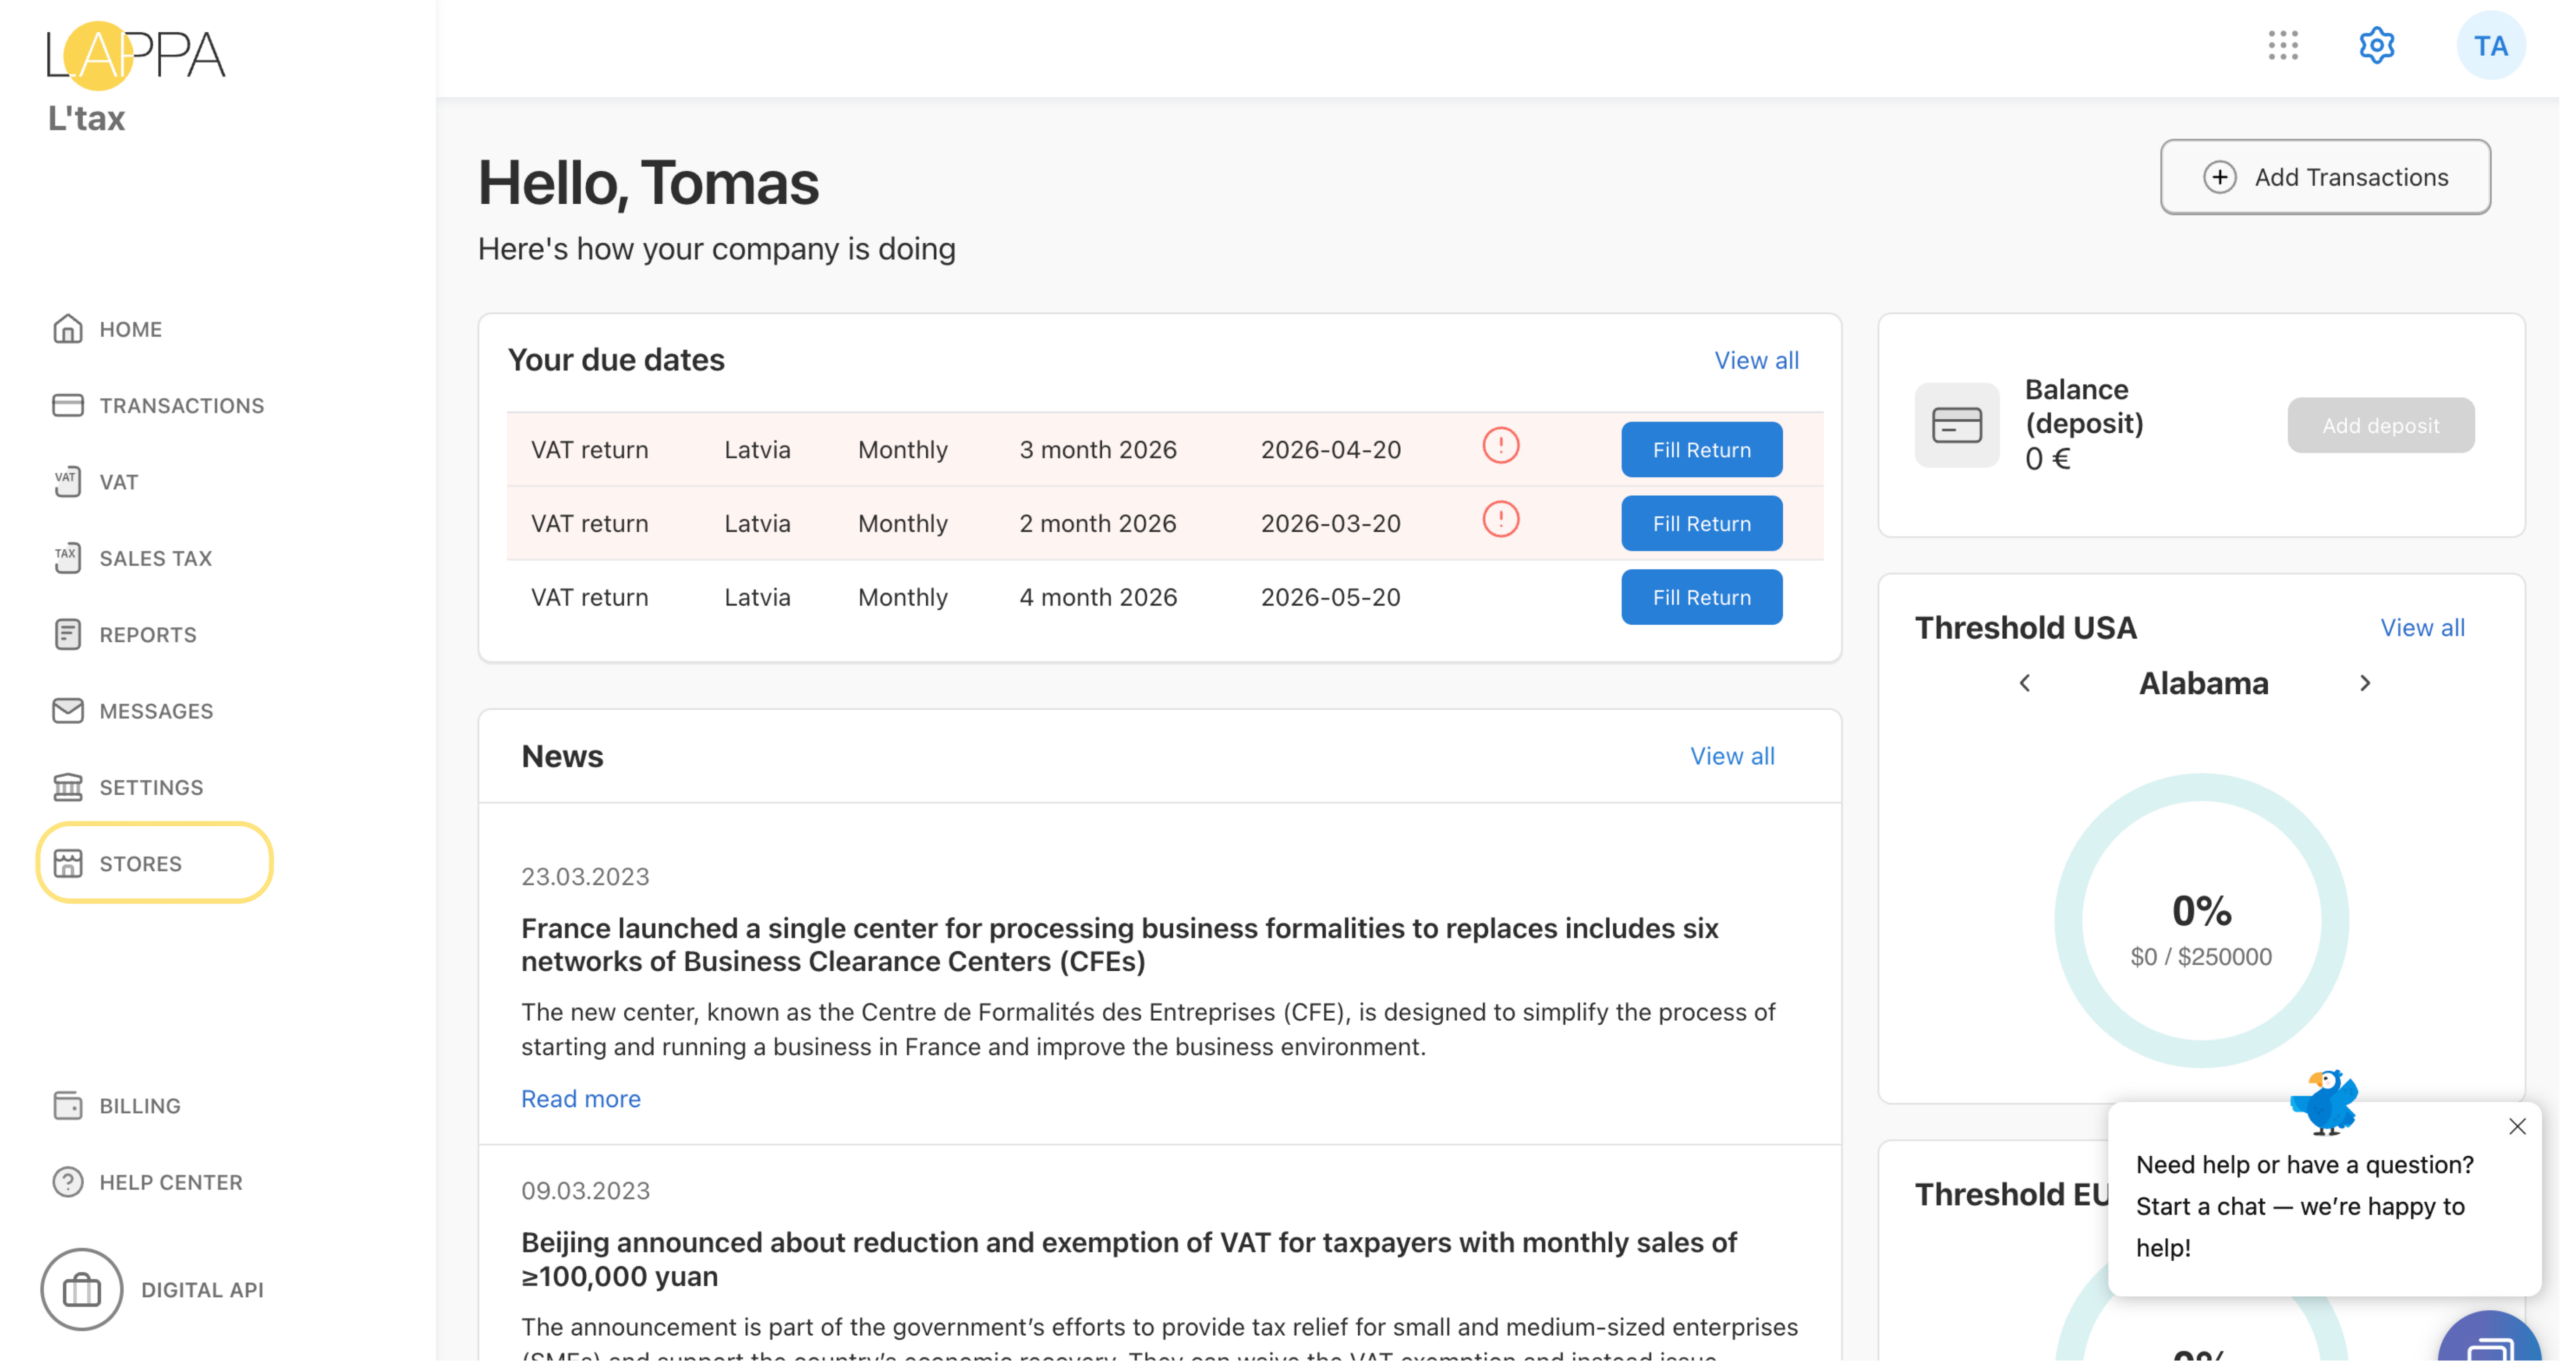
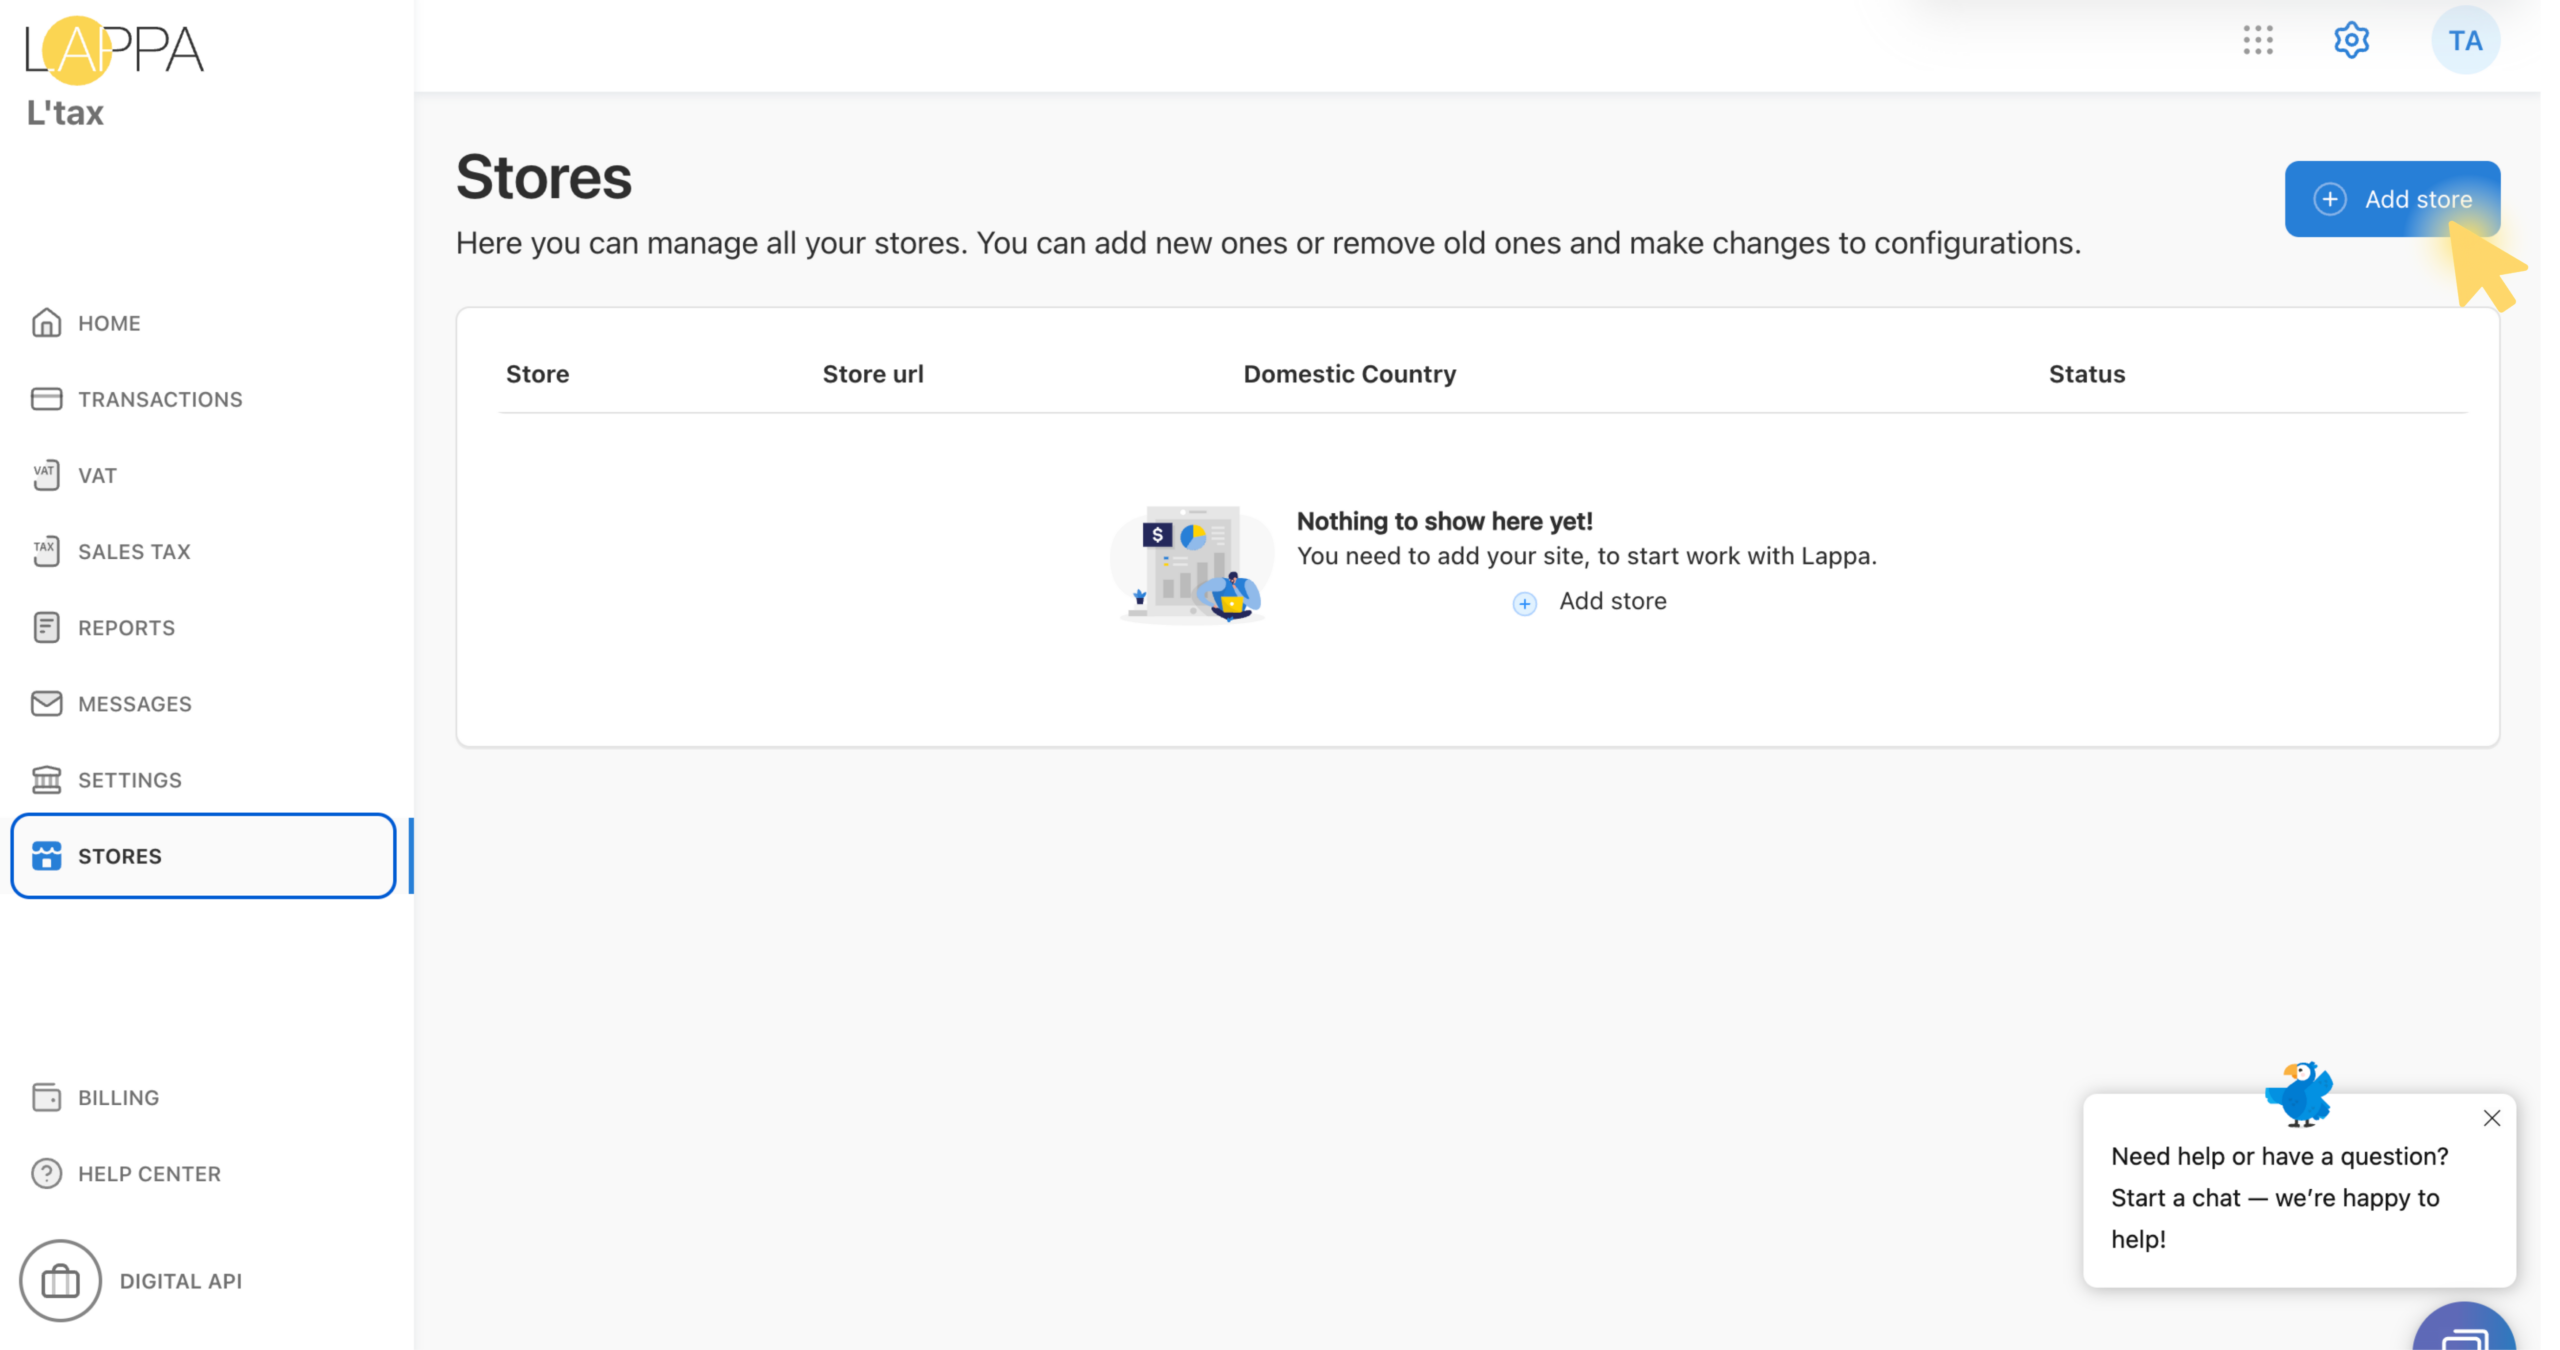
Step 1. Add your store
Navigate to the Stores section in the left-hand menu. If you have not yet connected a store, the list will be empty. Click + Add store in the top-right corner to begin.
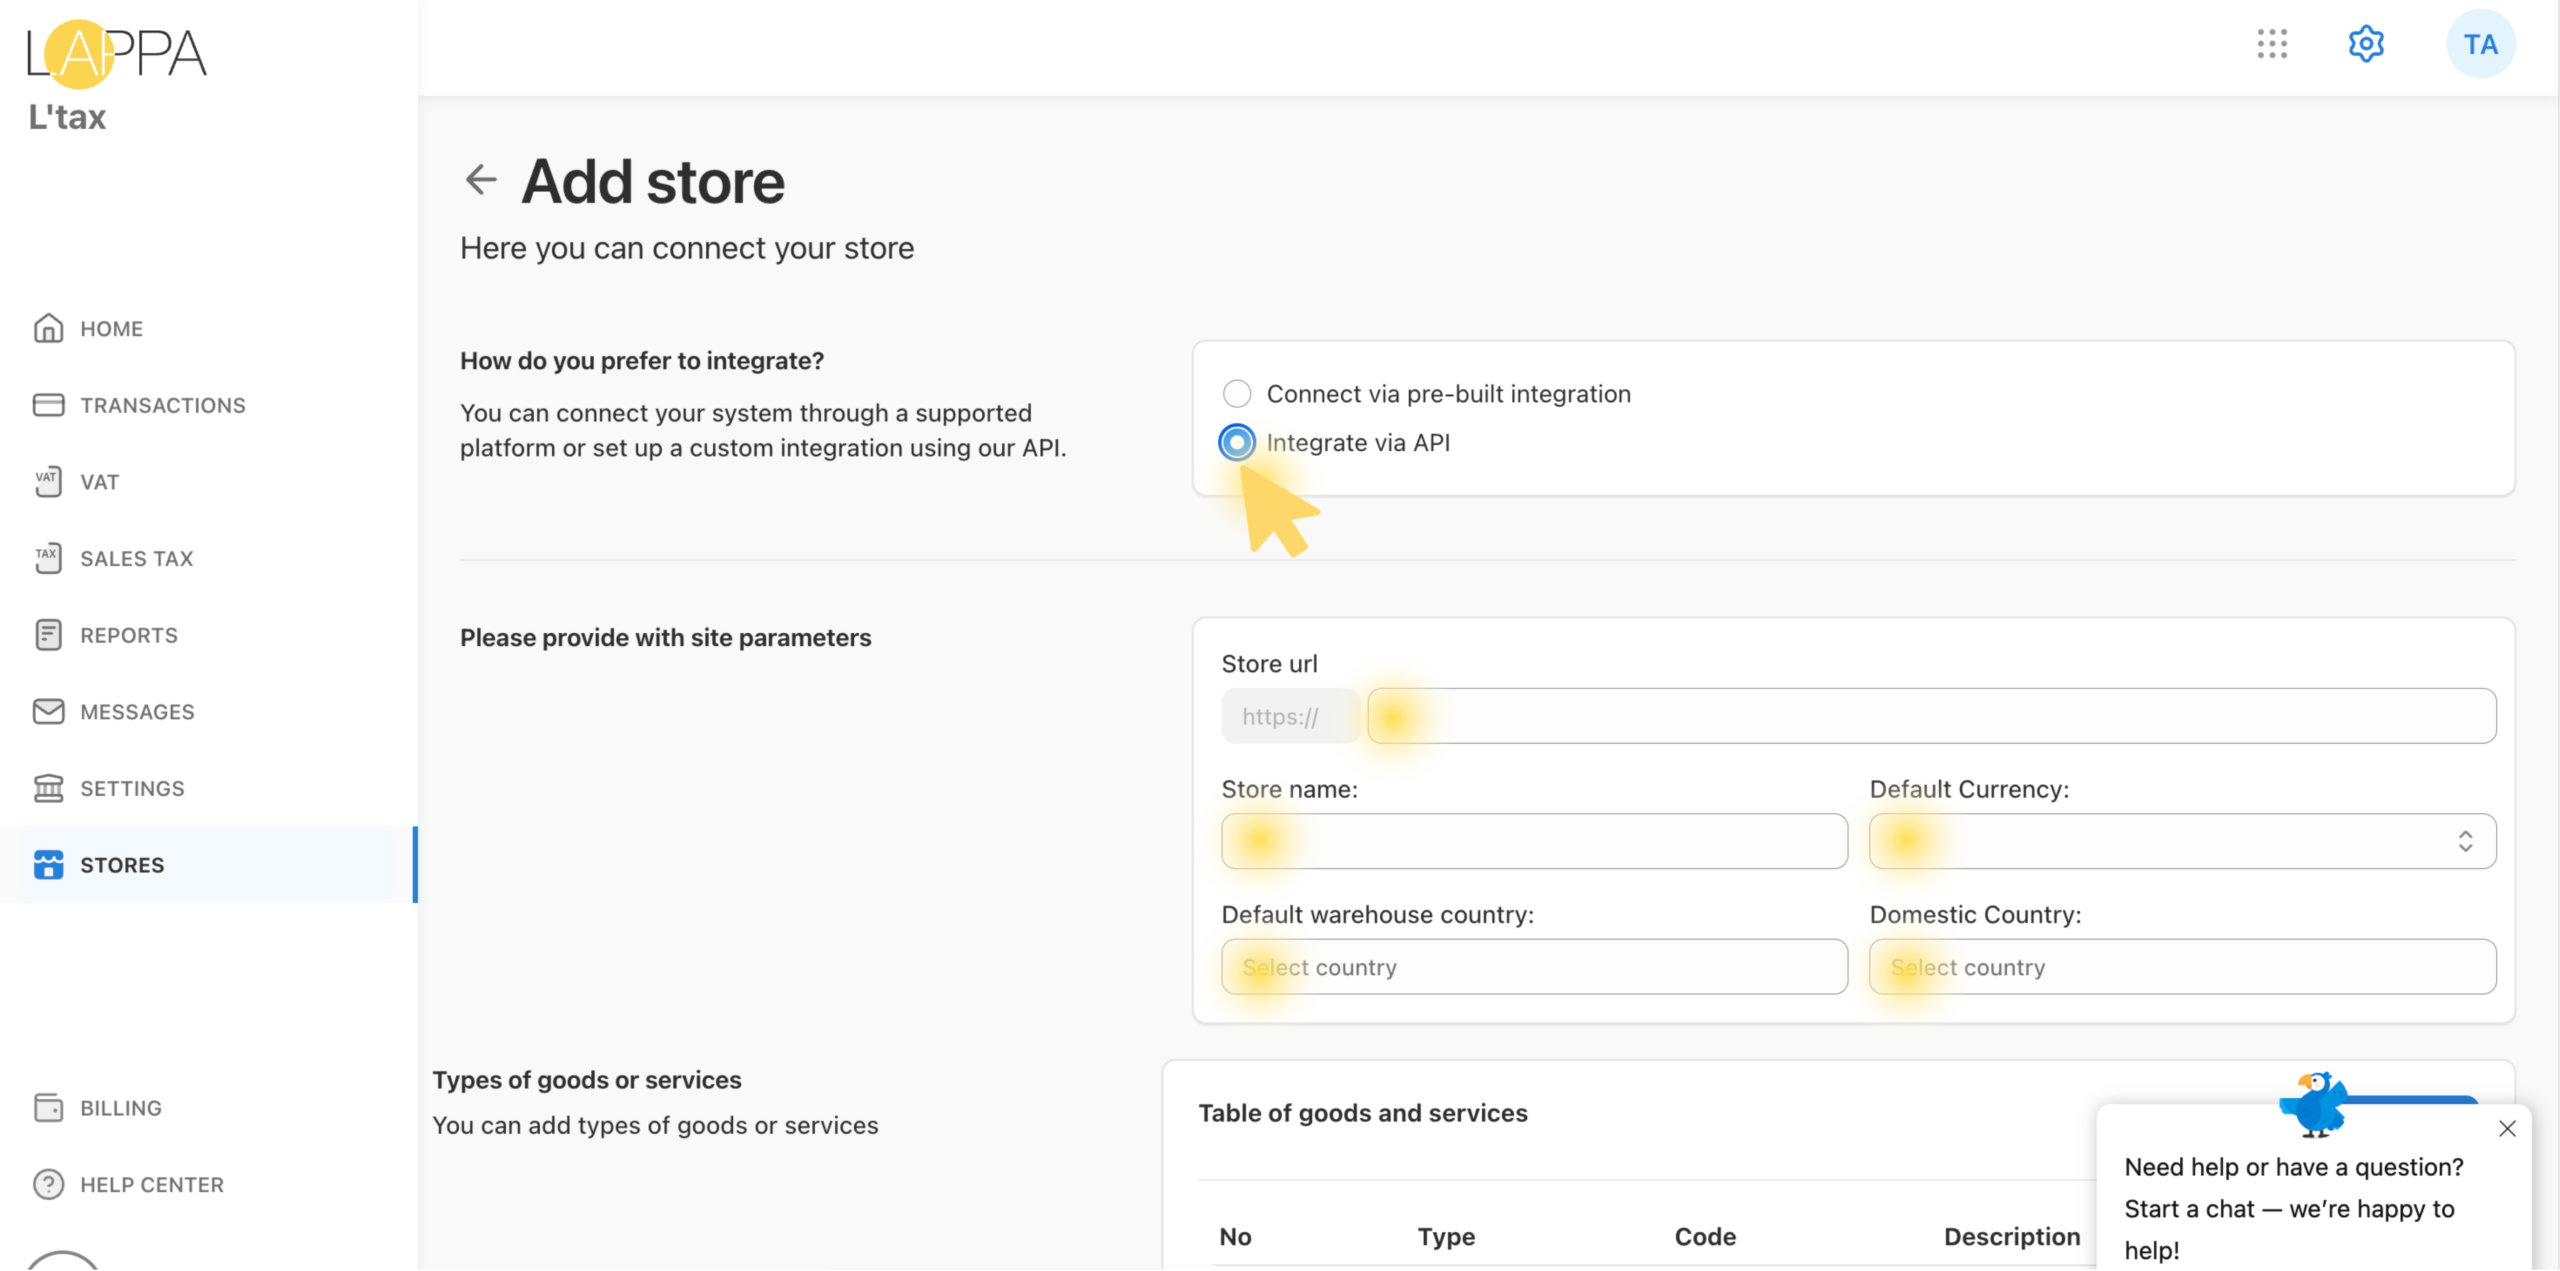
On the Add store page, you will be asked how you prefer to integrate:
- Connect via pre-built integration — for supported platforms (Shopify, WooCommerce, etc.)
- Integrate via API — for a custom integration using your own system
Select Integrate via API, then fill in all required store parameters:
- Store URL — your website address (e.g. https://digital.com)
- Store name — a display name for this store
- Default Currency
- Default Warehouse Country
- Domestic Country — the country where your business is registered
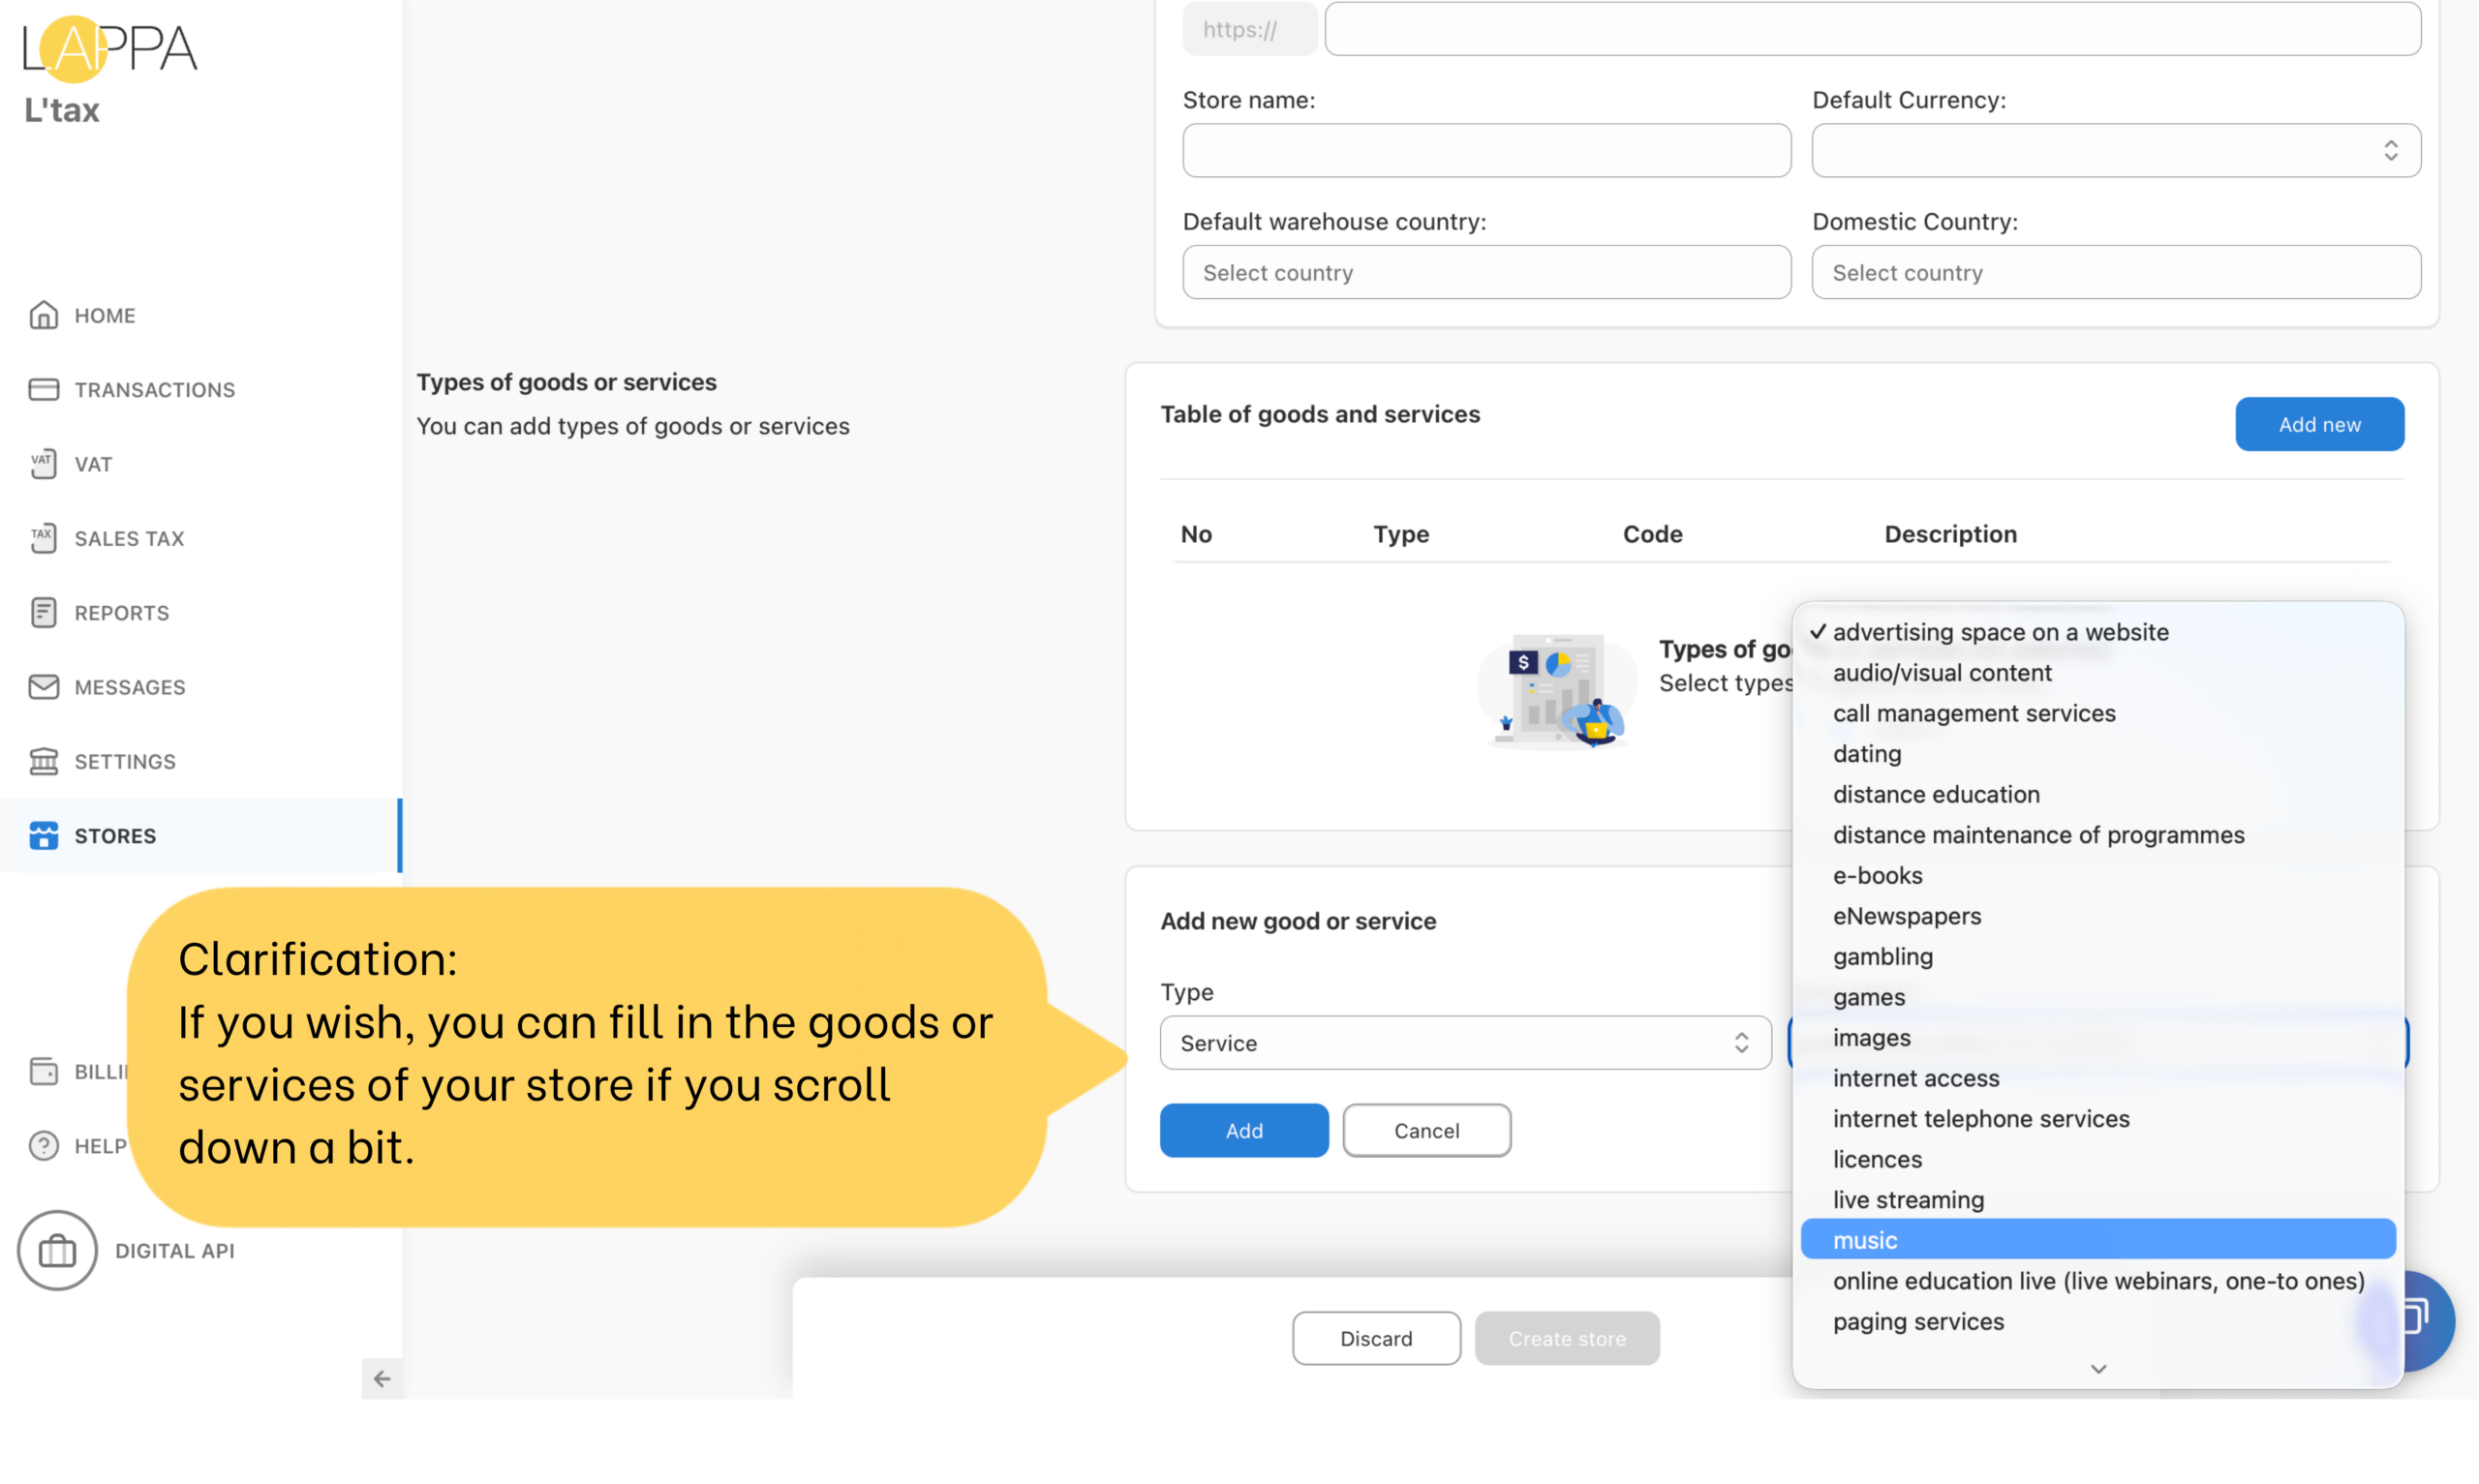
Click Create store to save. Your store will appear in the Stores list.
Step 2. Add your VAT or sales tax number
- Go to Settings in the main menu and open the VAT tab.
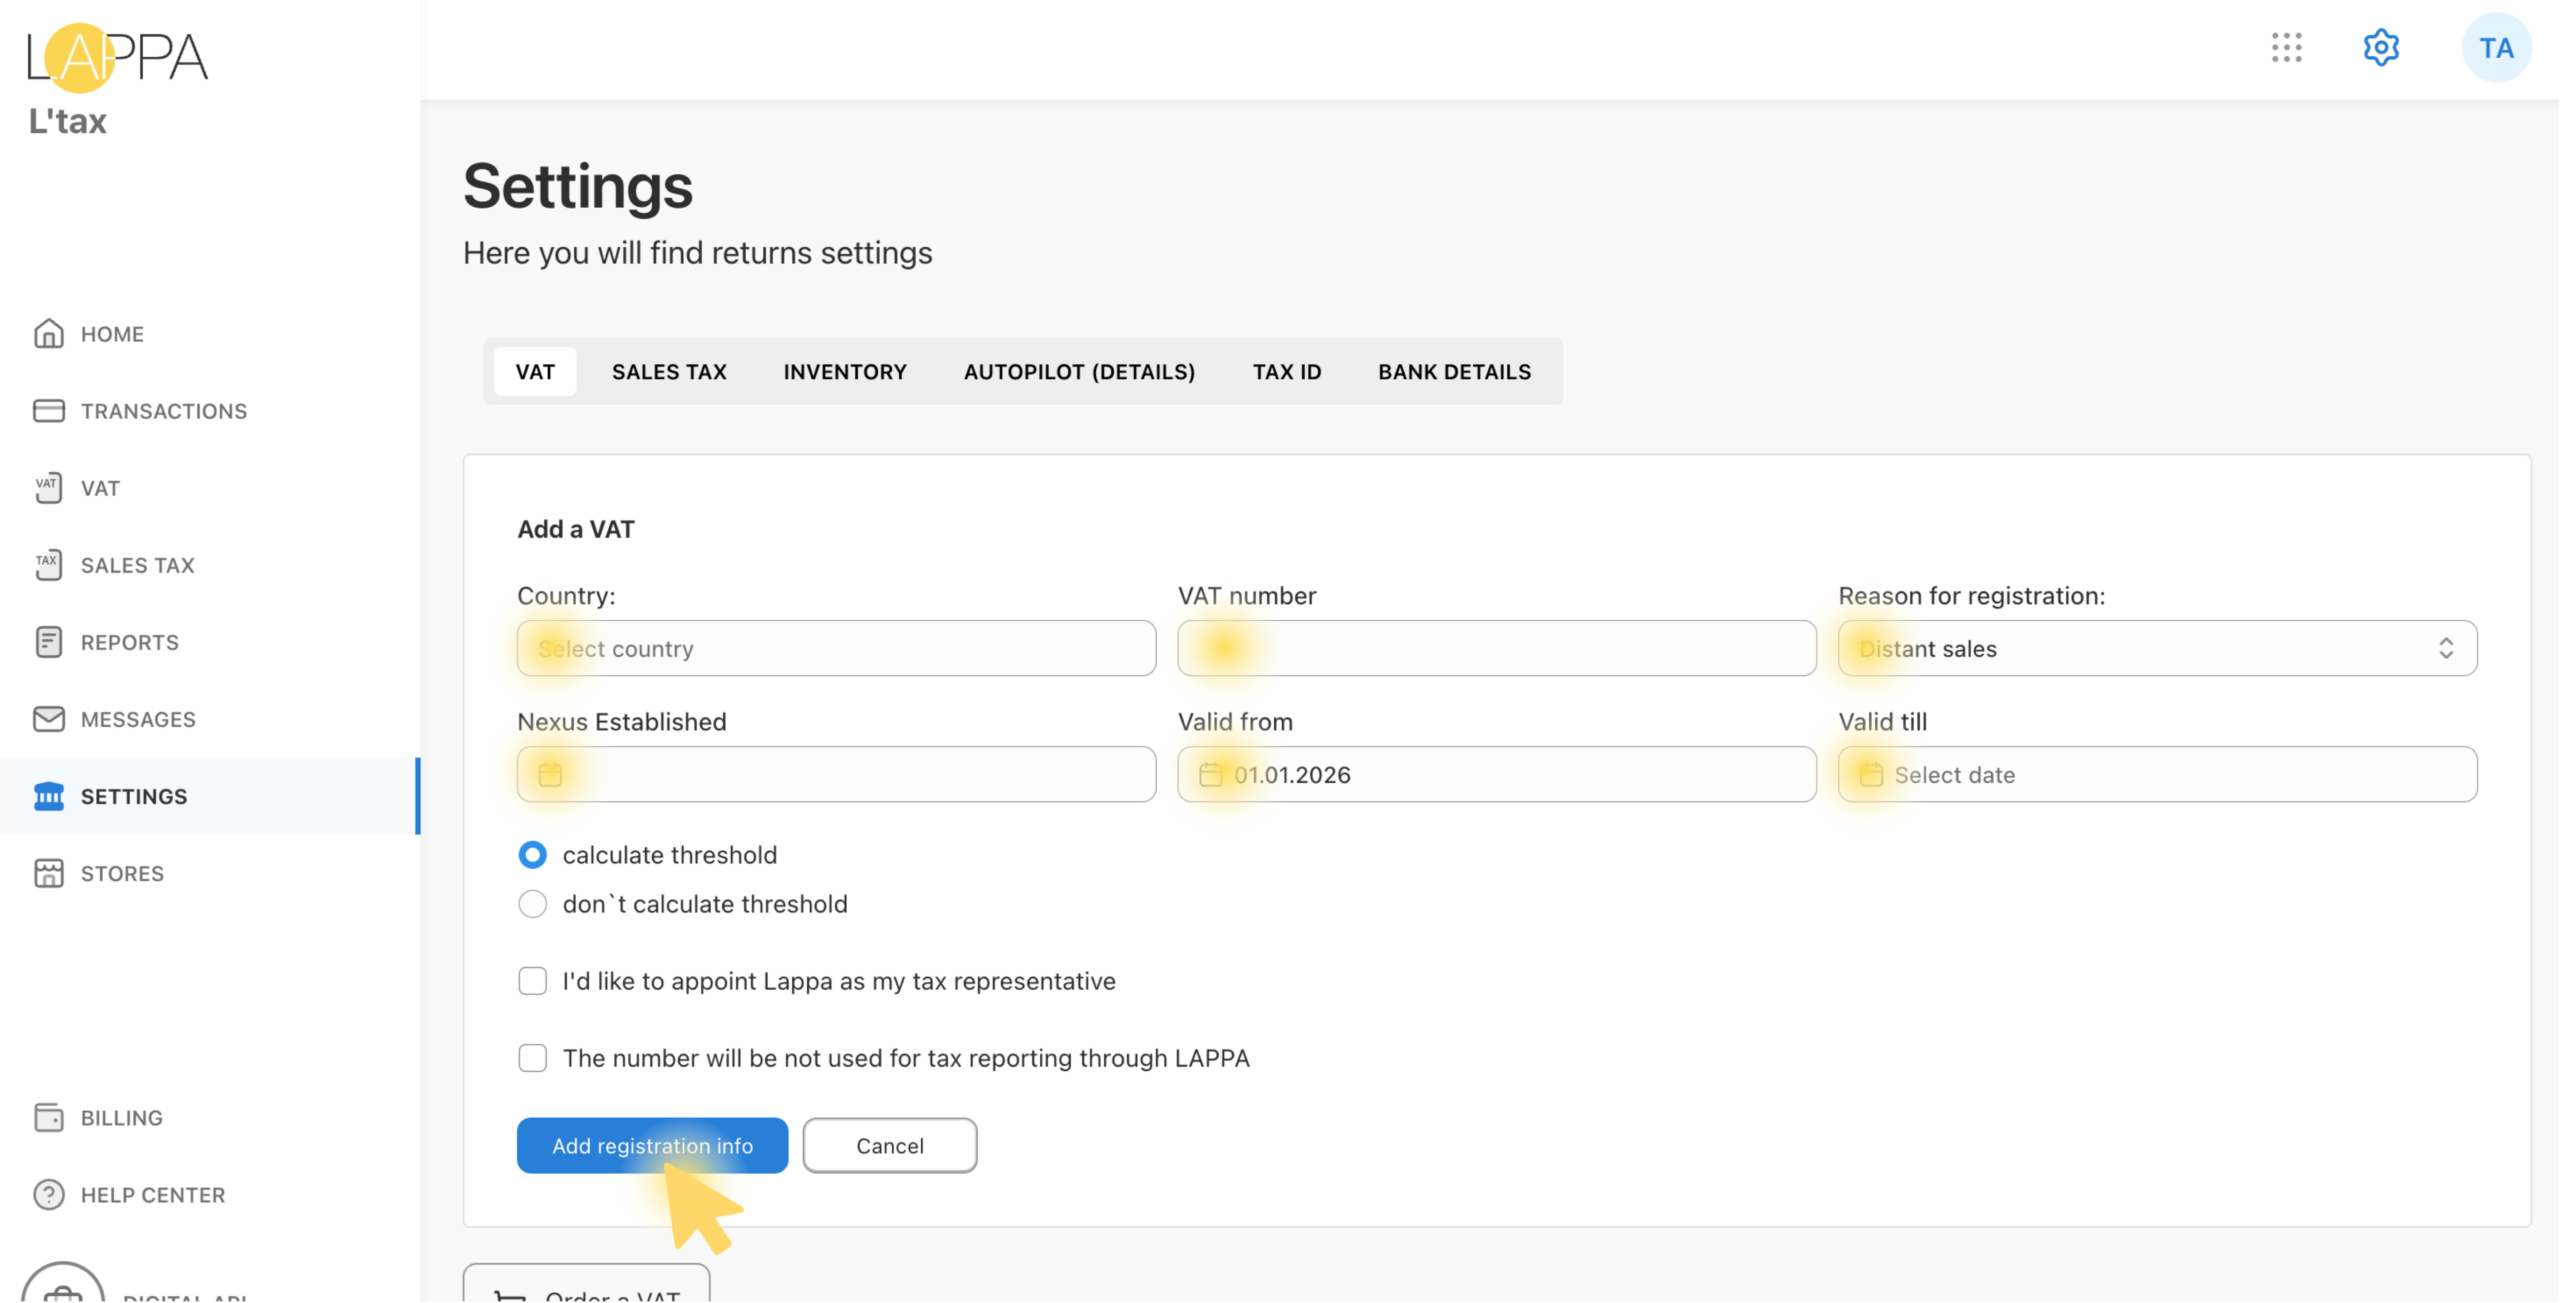
- Click + Add a VAT to register a new tax number.
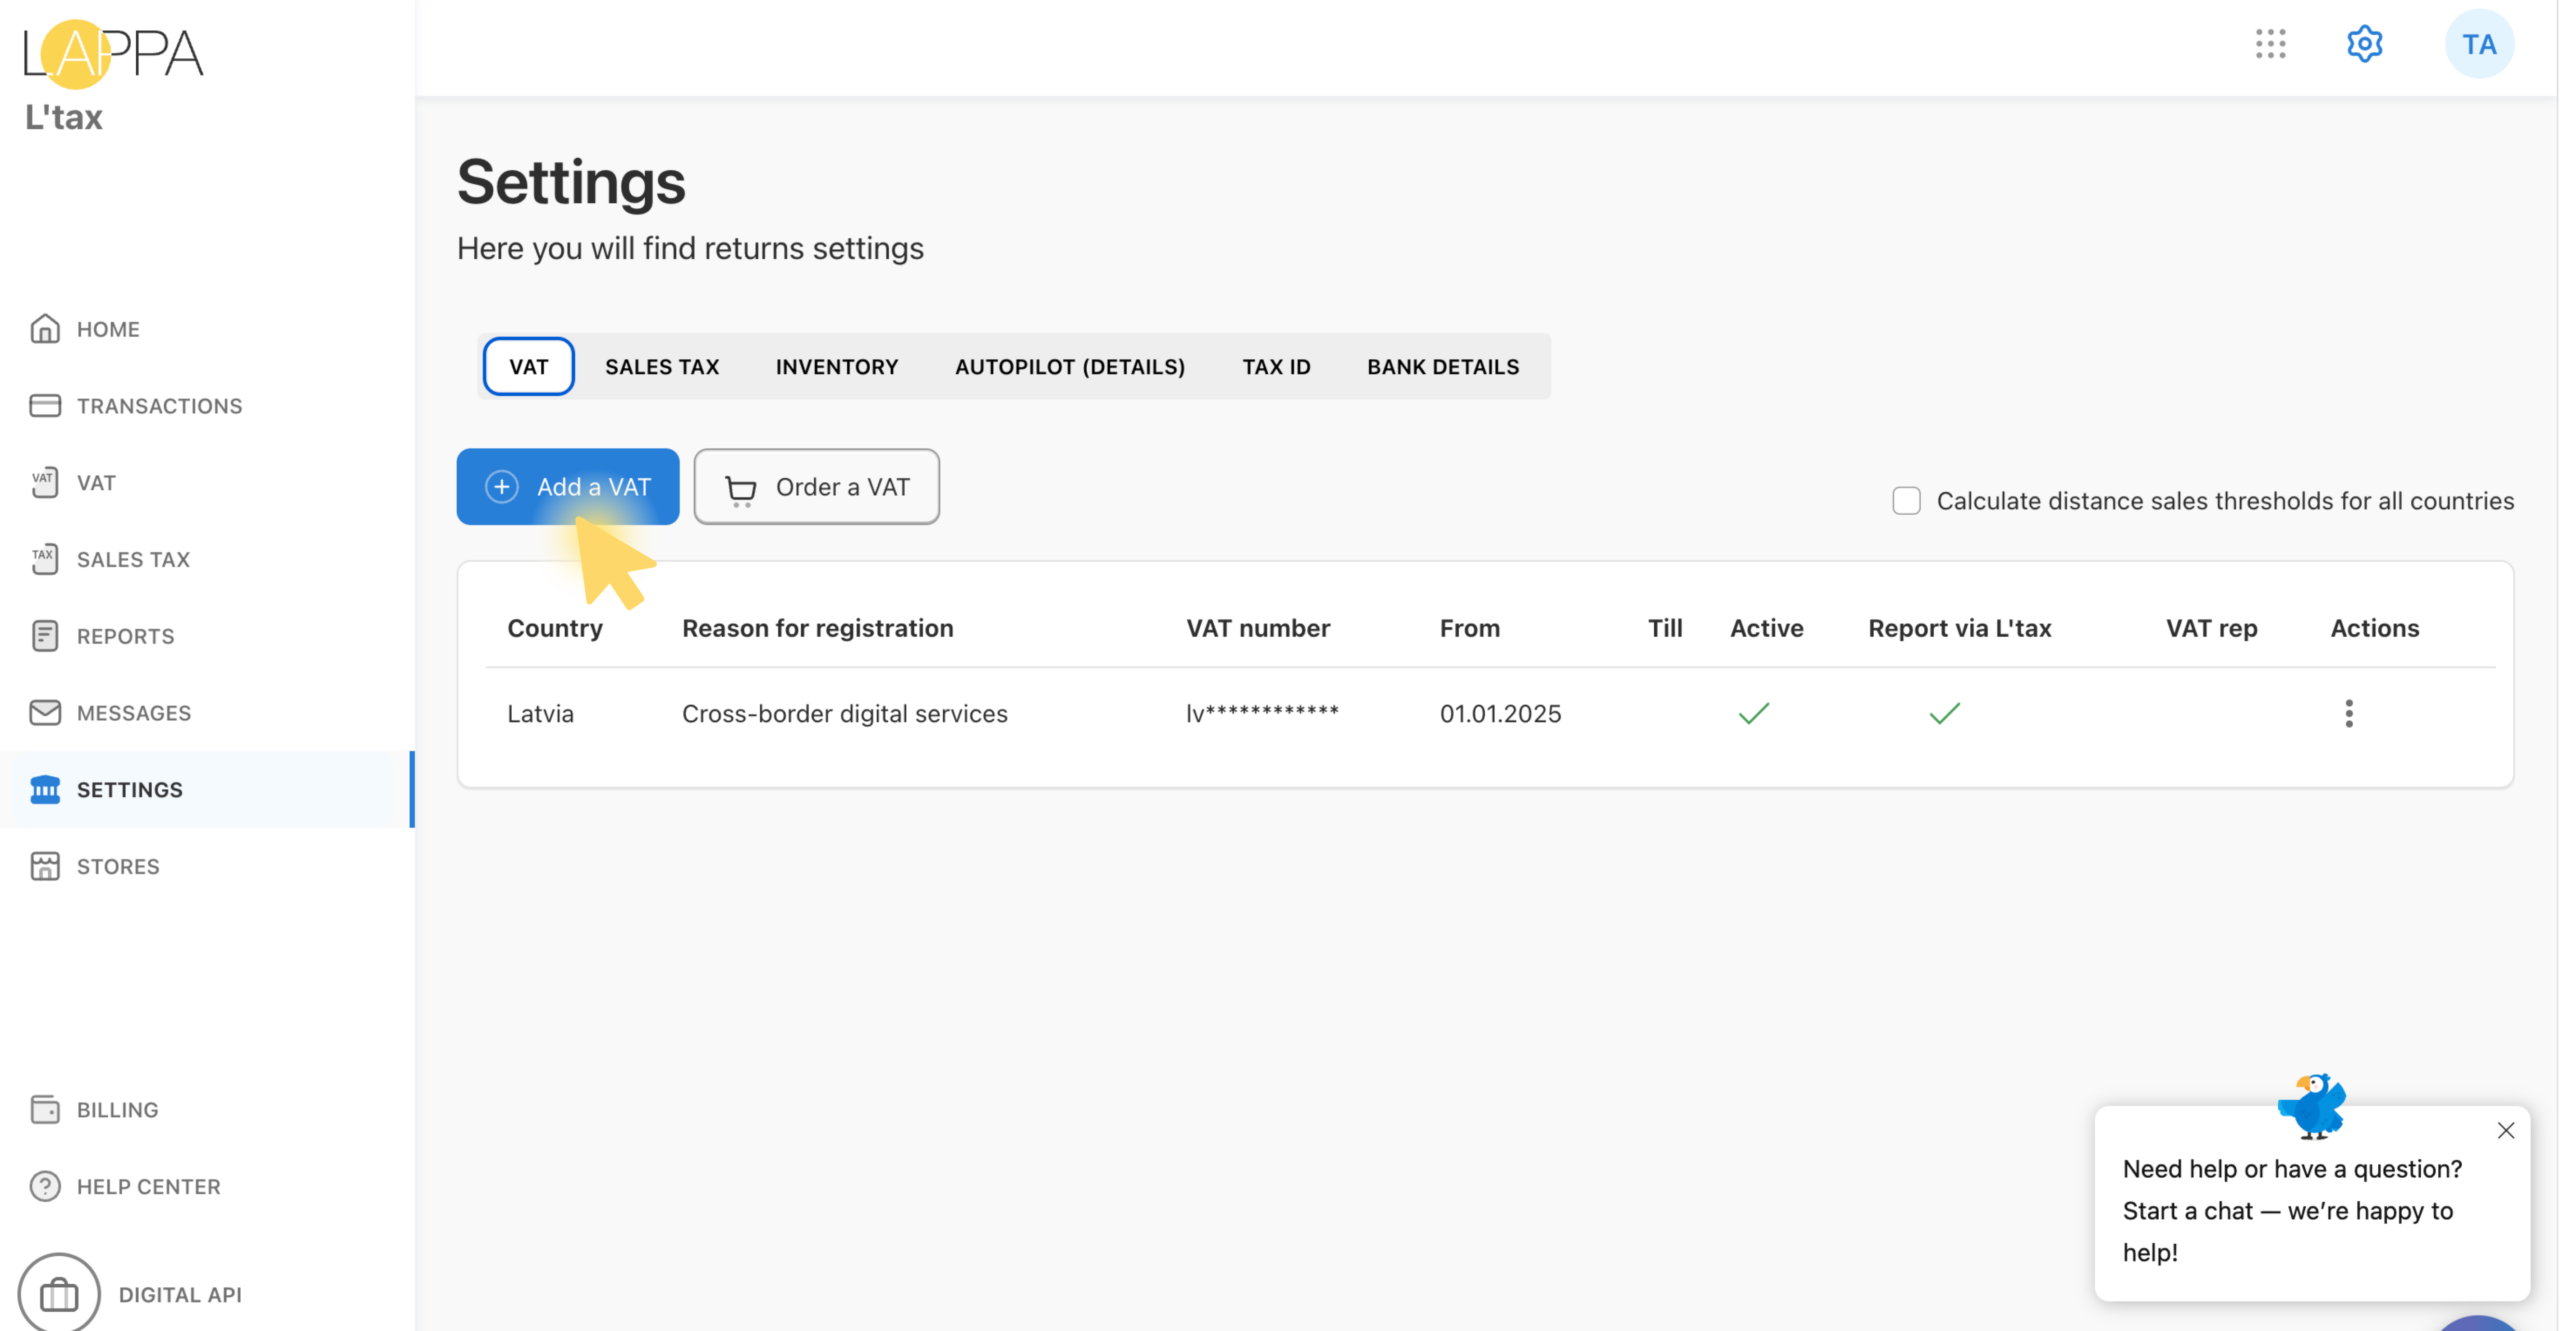
- Fill in the country, reason for registration, and your VAT/Sales Tax number, then save.
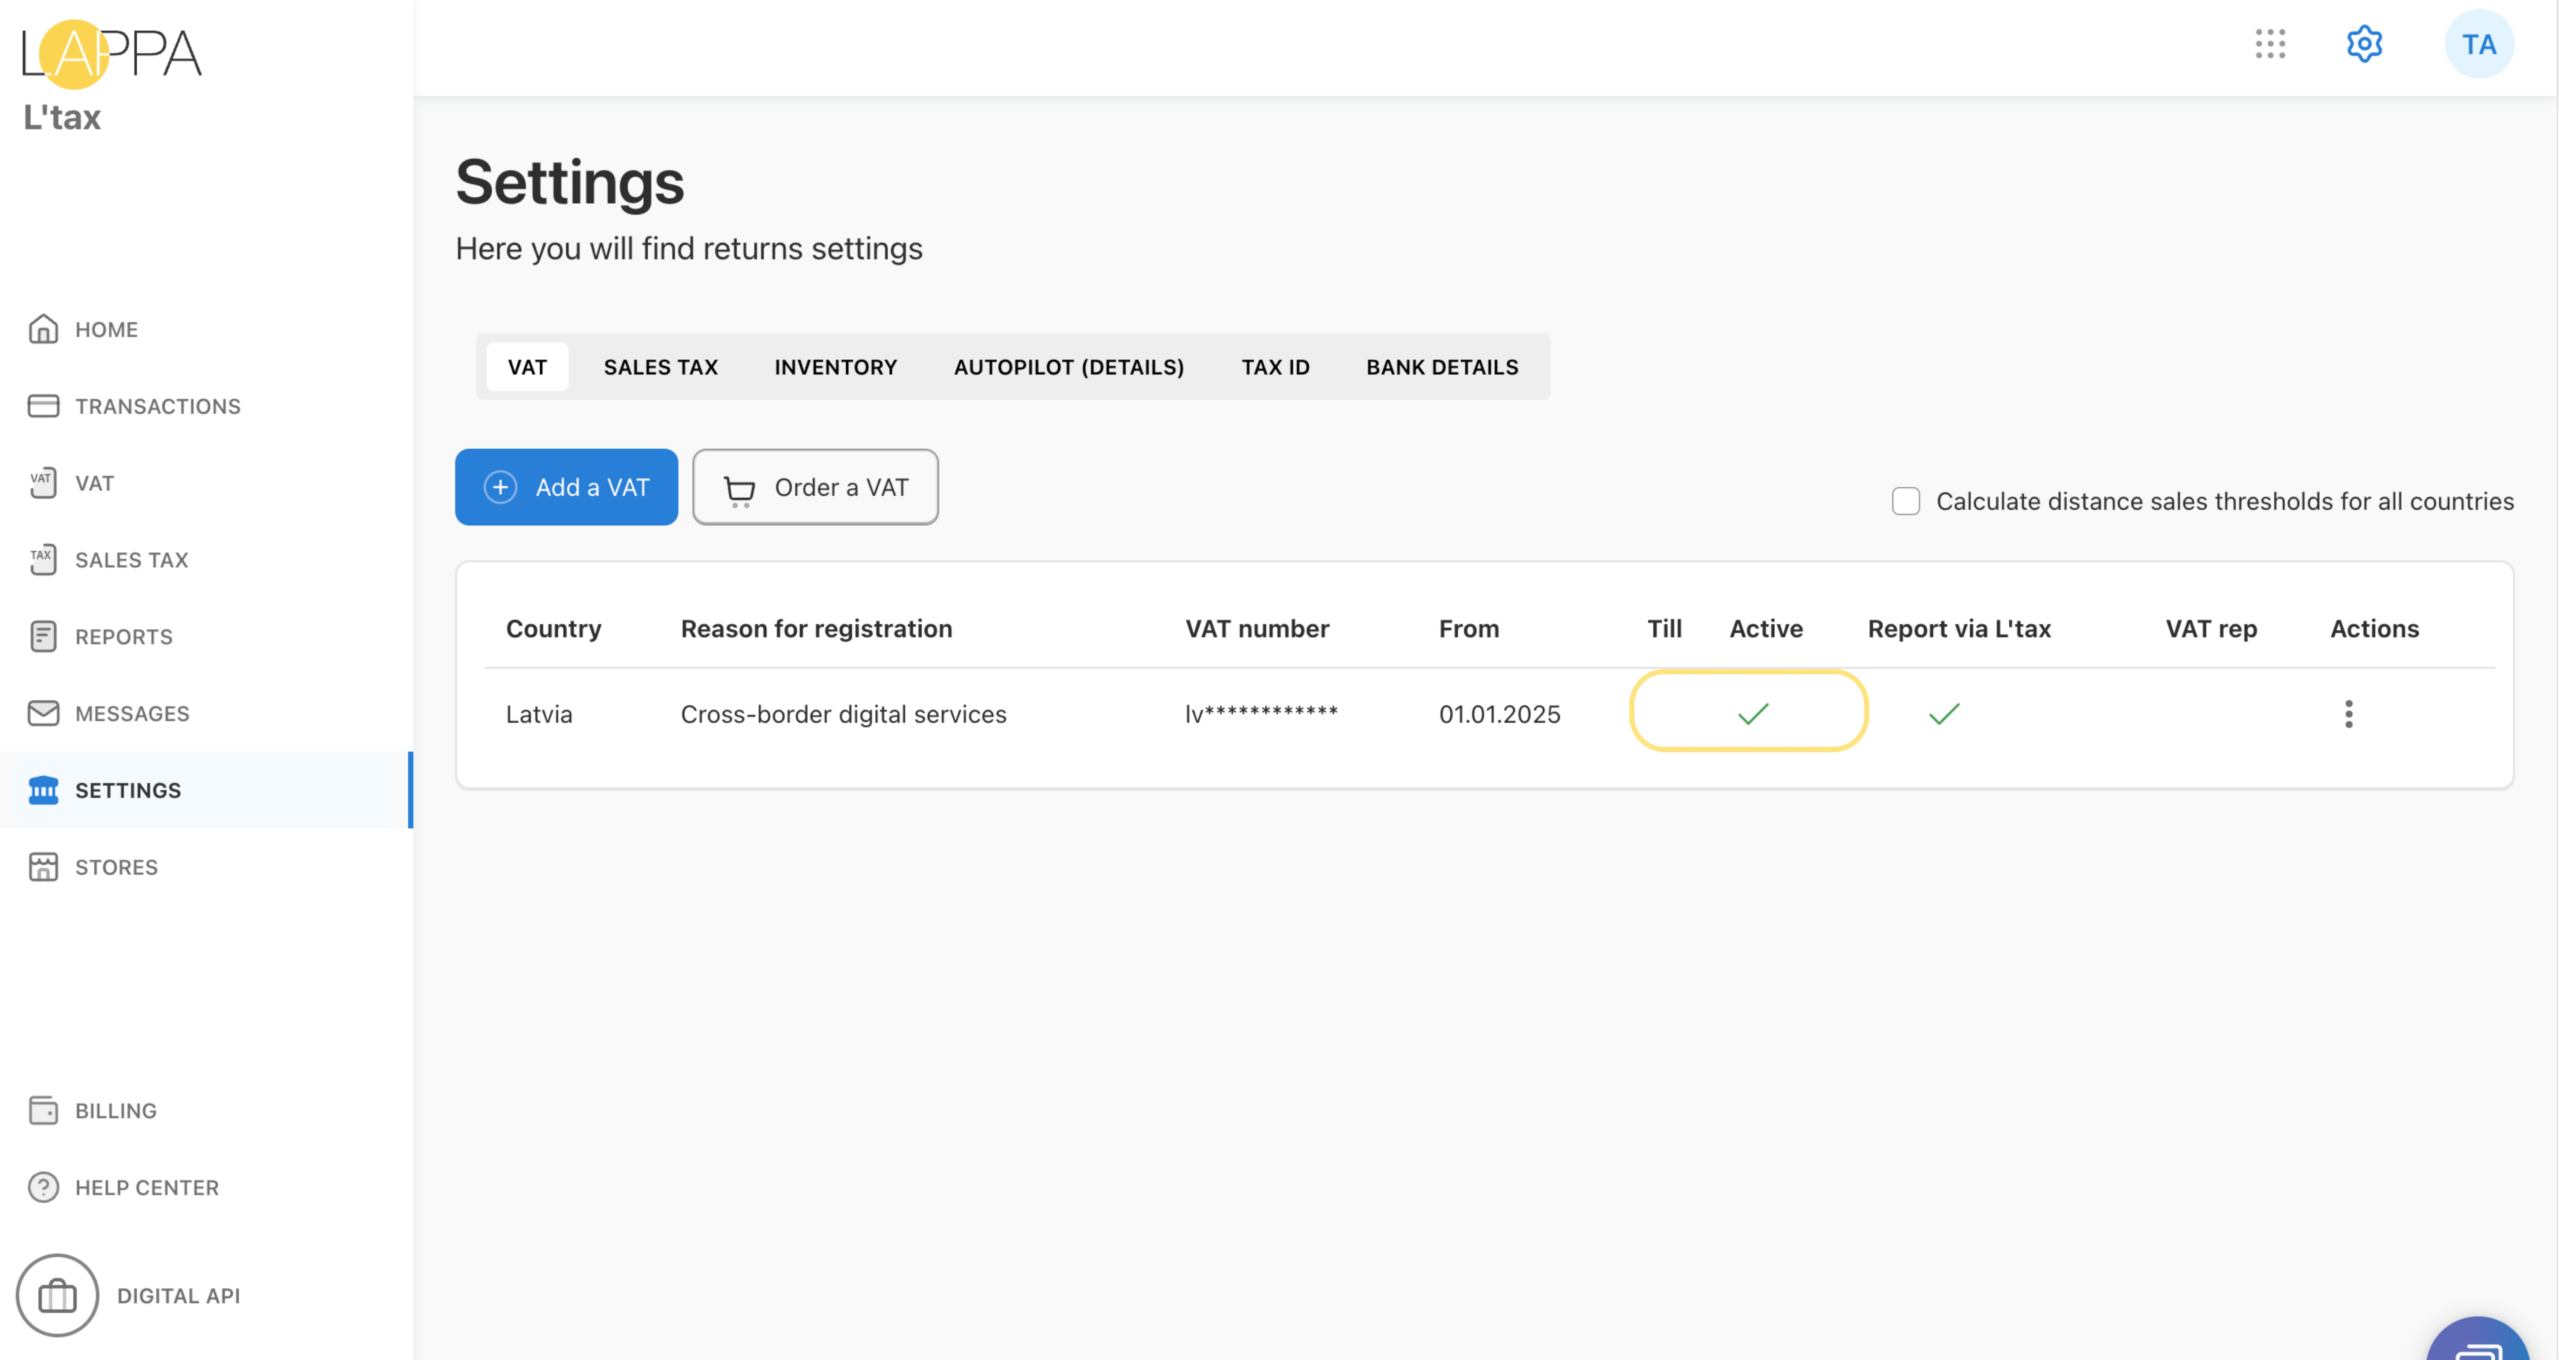
Important: After adding your number, wait until the Active column shows a green check mark ✅. Only active tax numbers are eligible for transaction processing and reporting. A red cross ❌ means the number has not yet been confirmed.
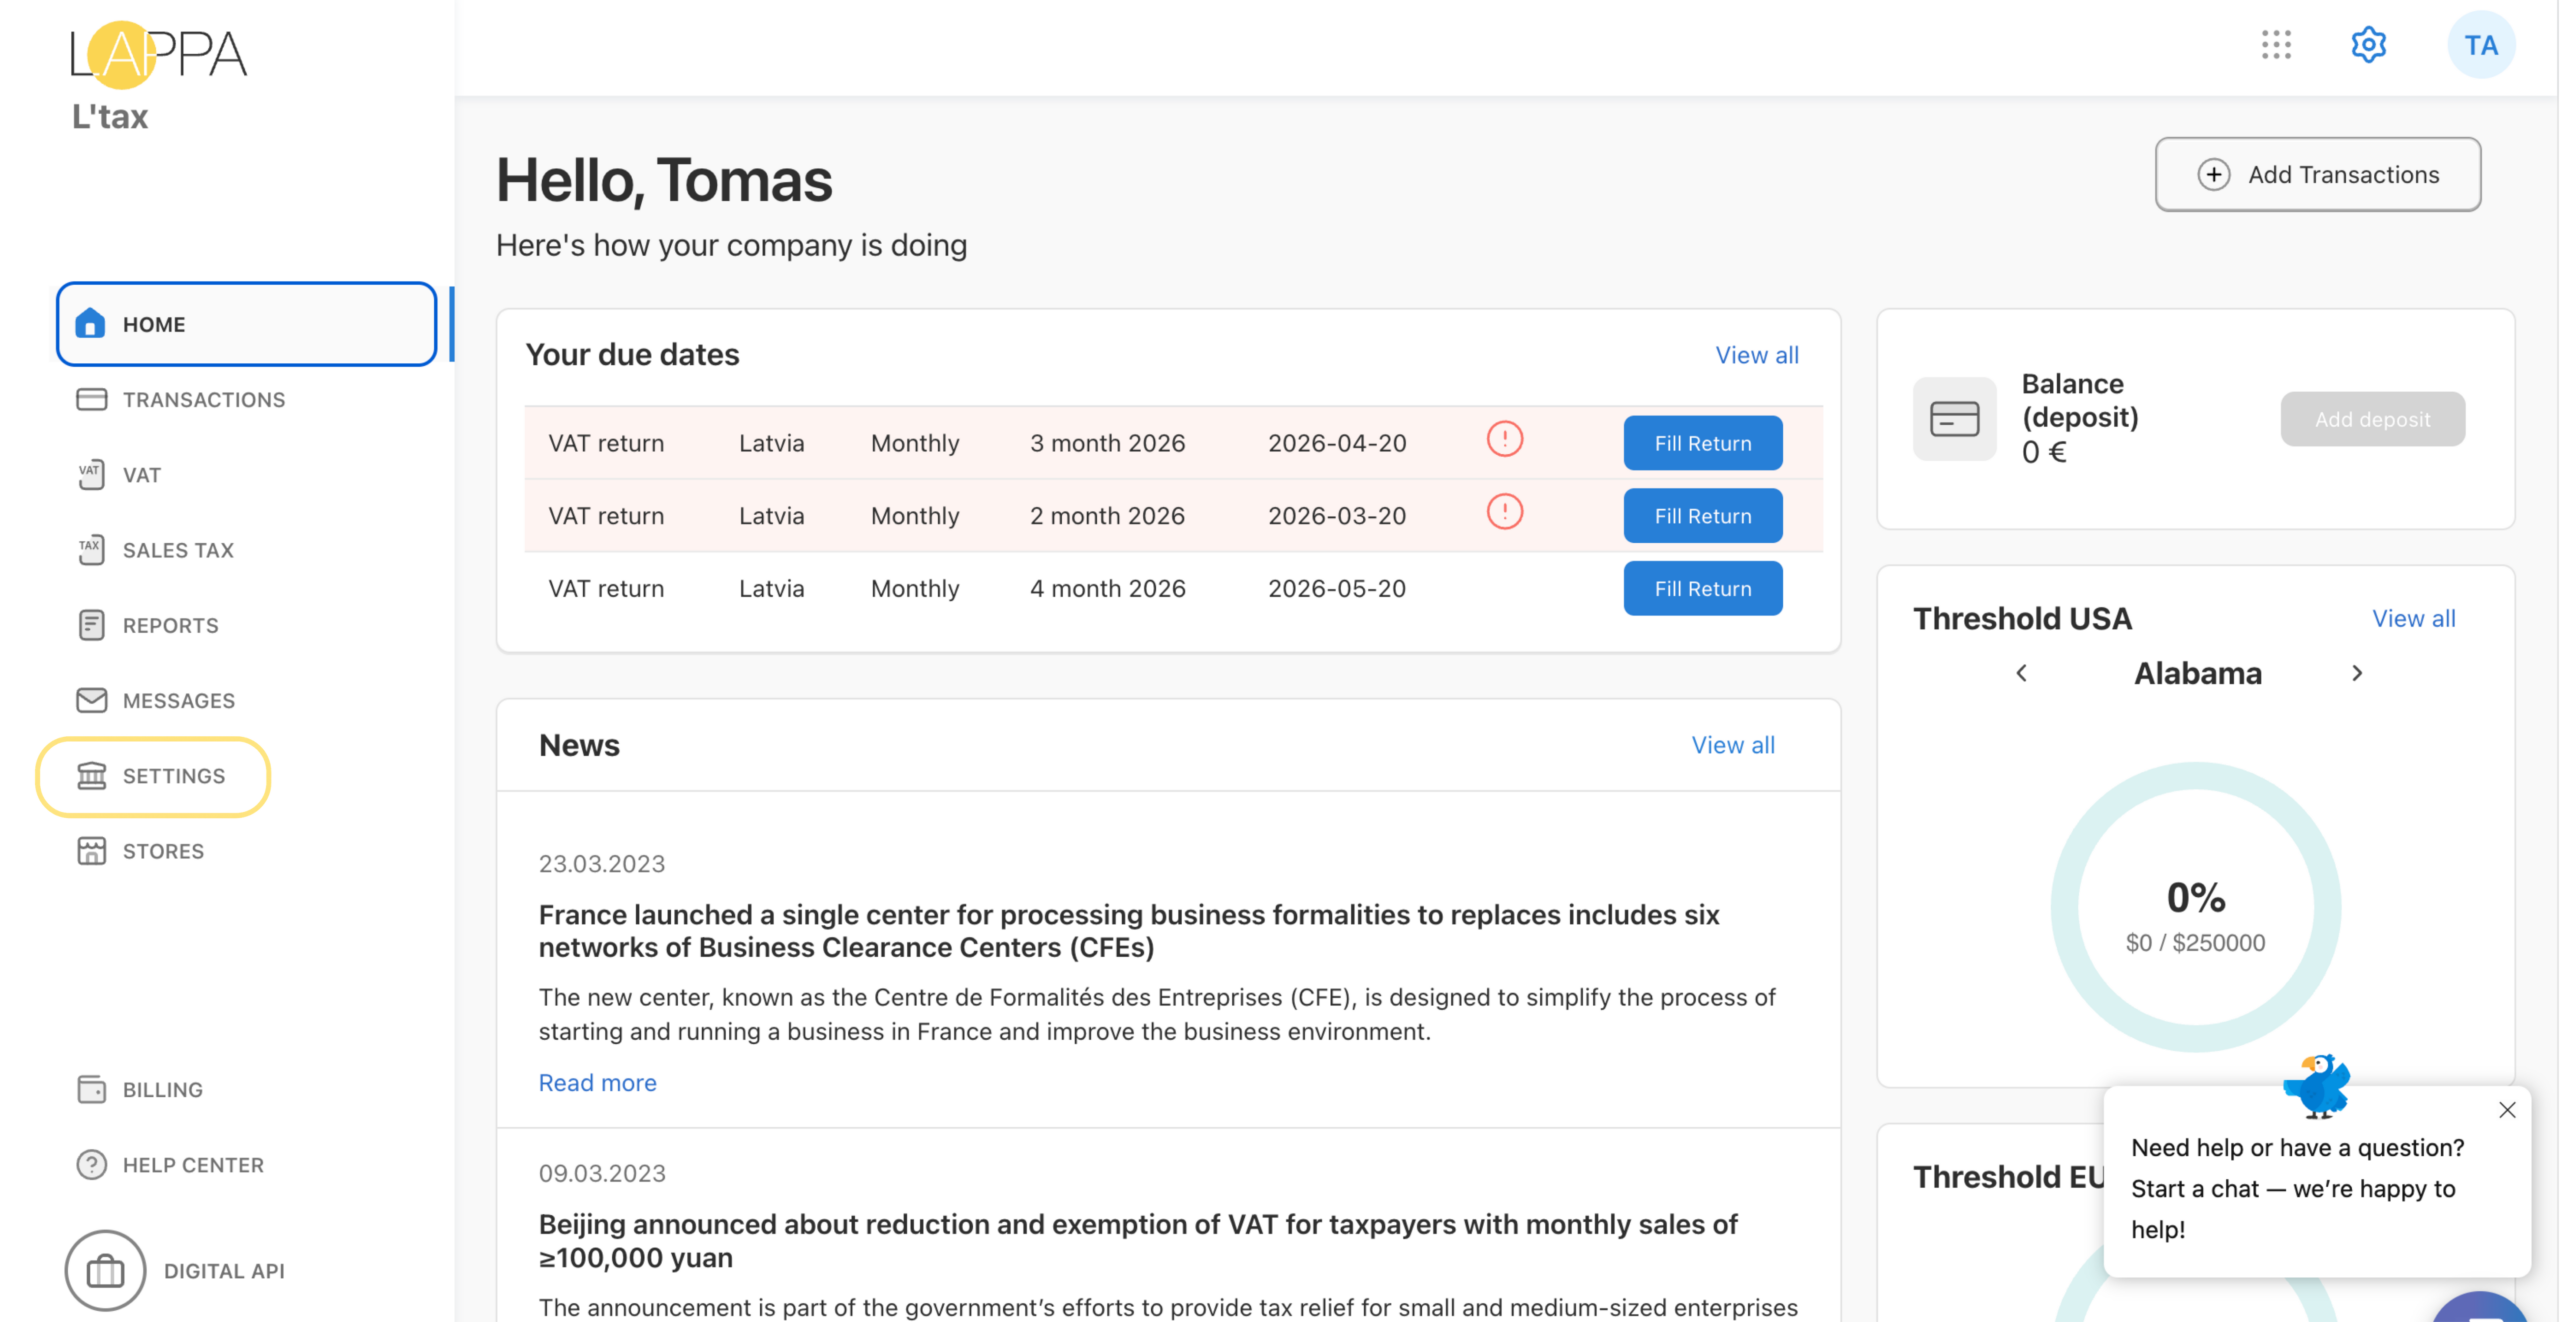
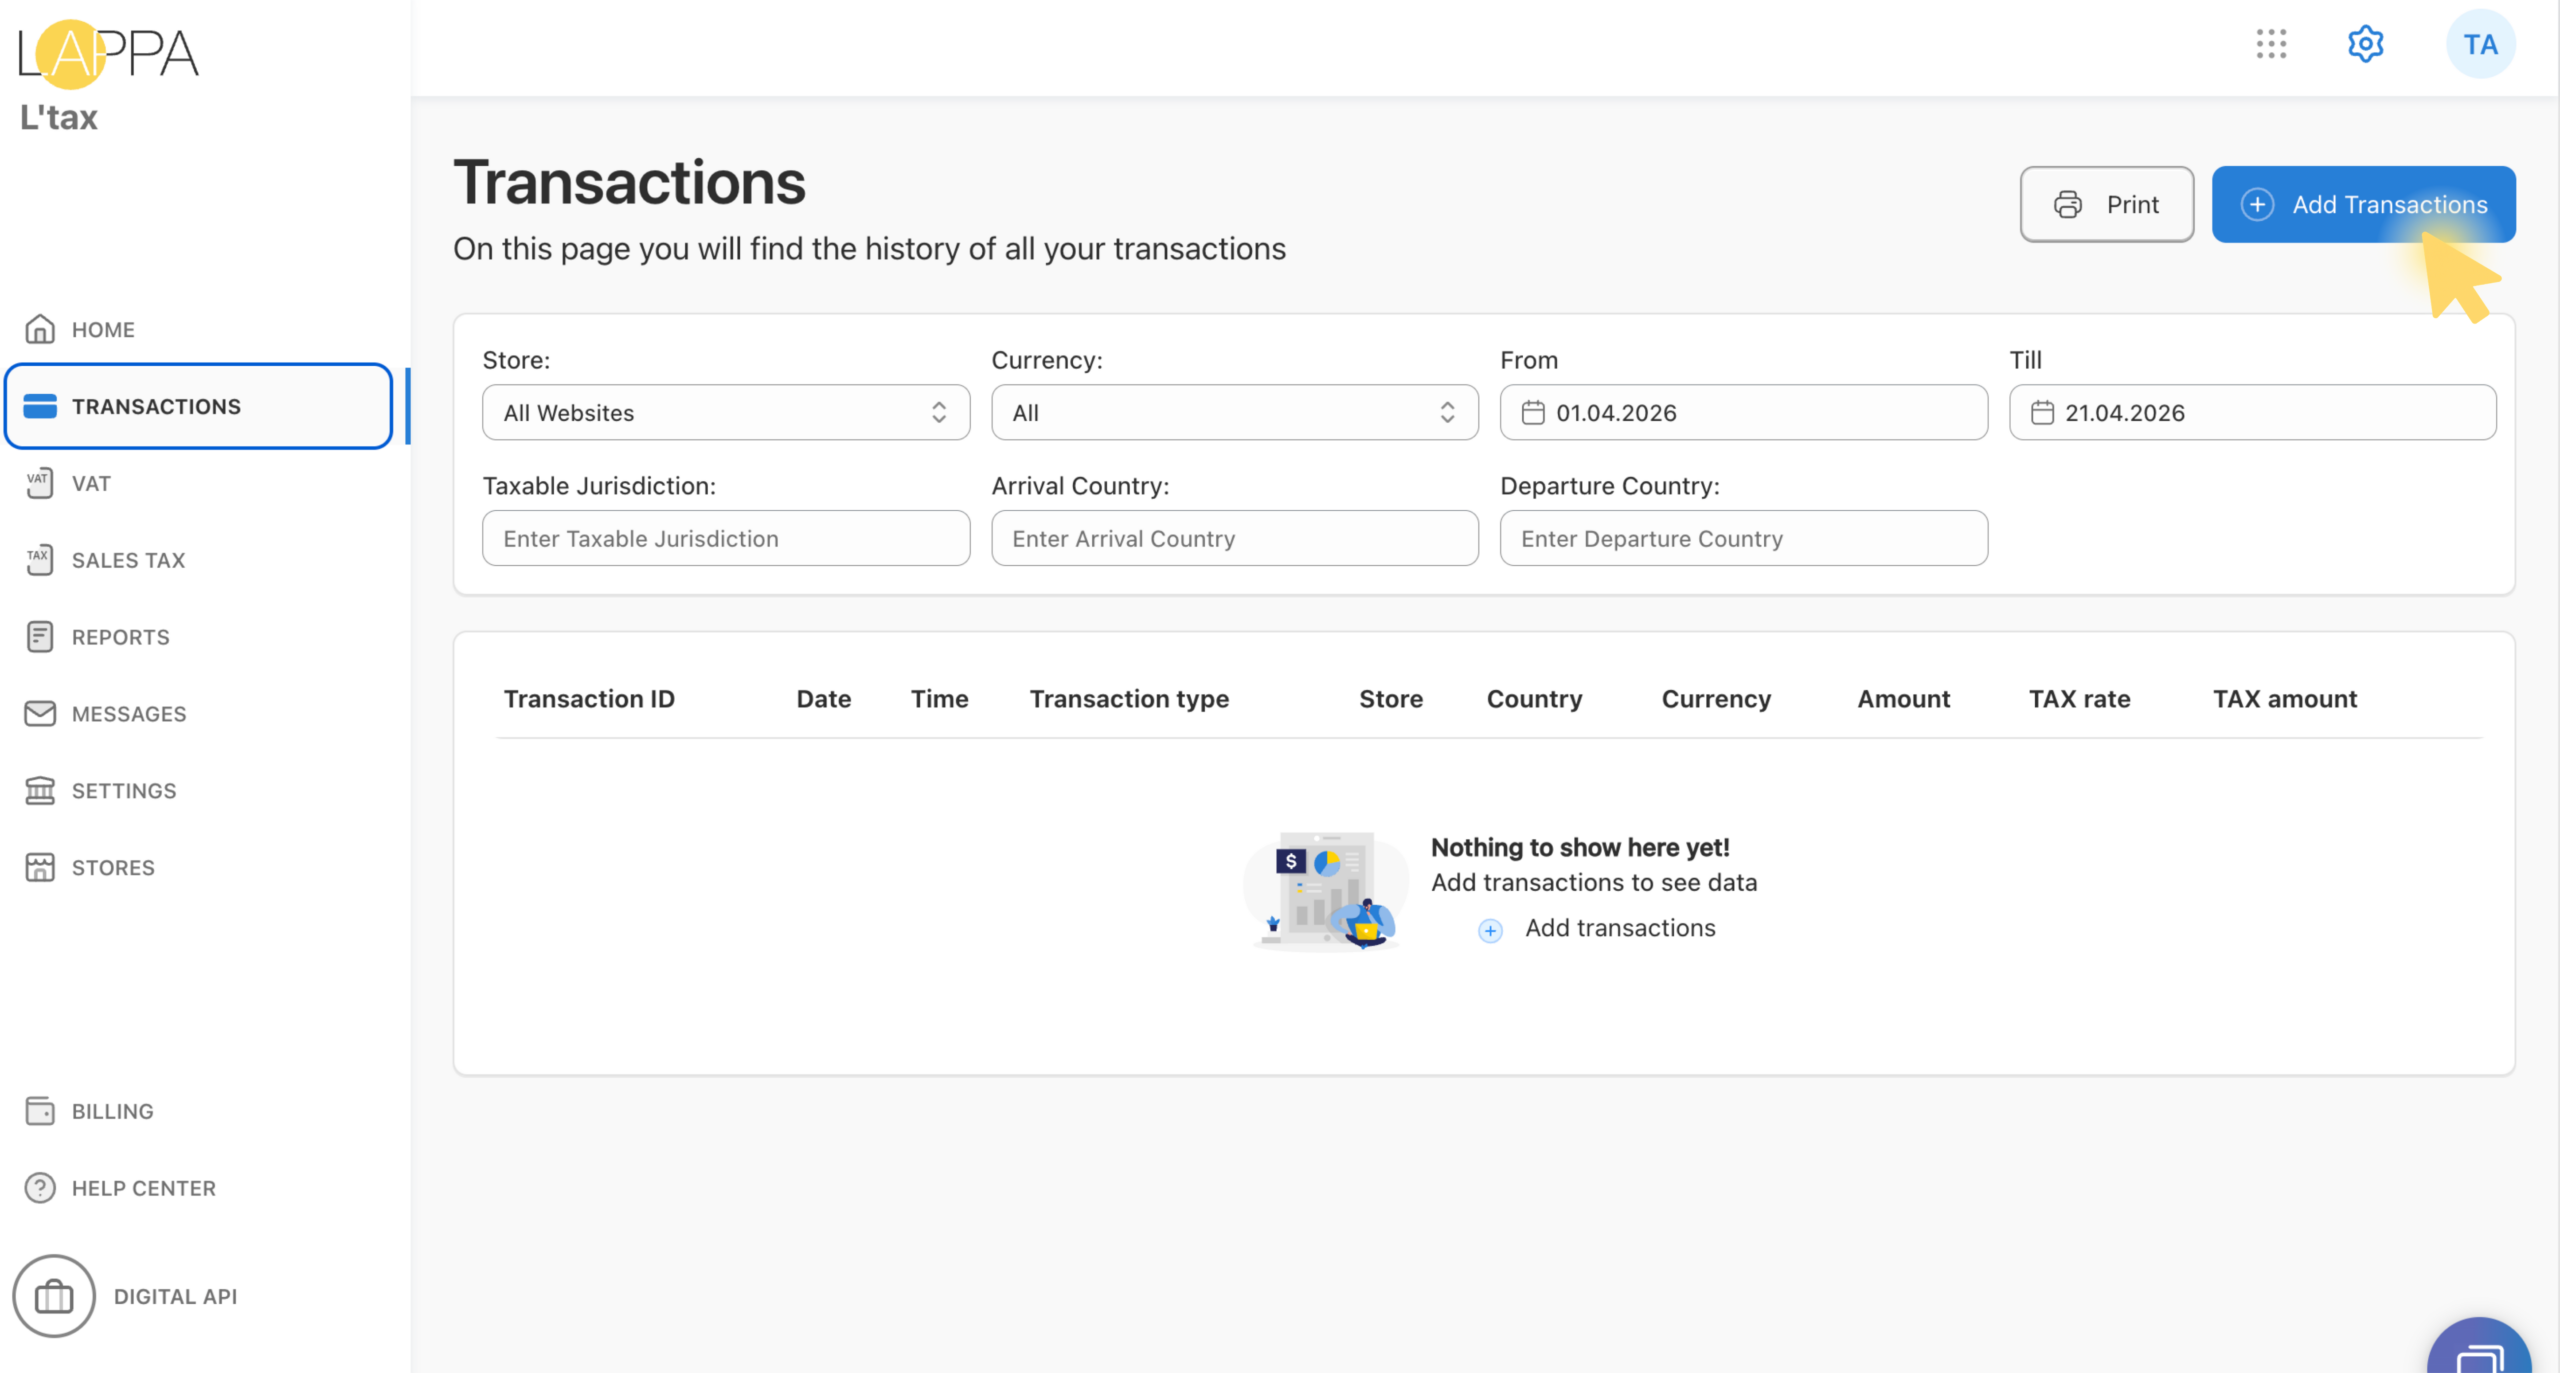
Step 3. Import your transactions
This is the main step. Navigate to Transactions in the left-hand menu. If you have not yet imported any transactions, the list will be empty. Click + Add Transactions.
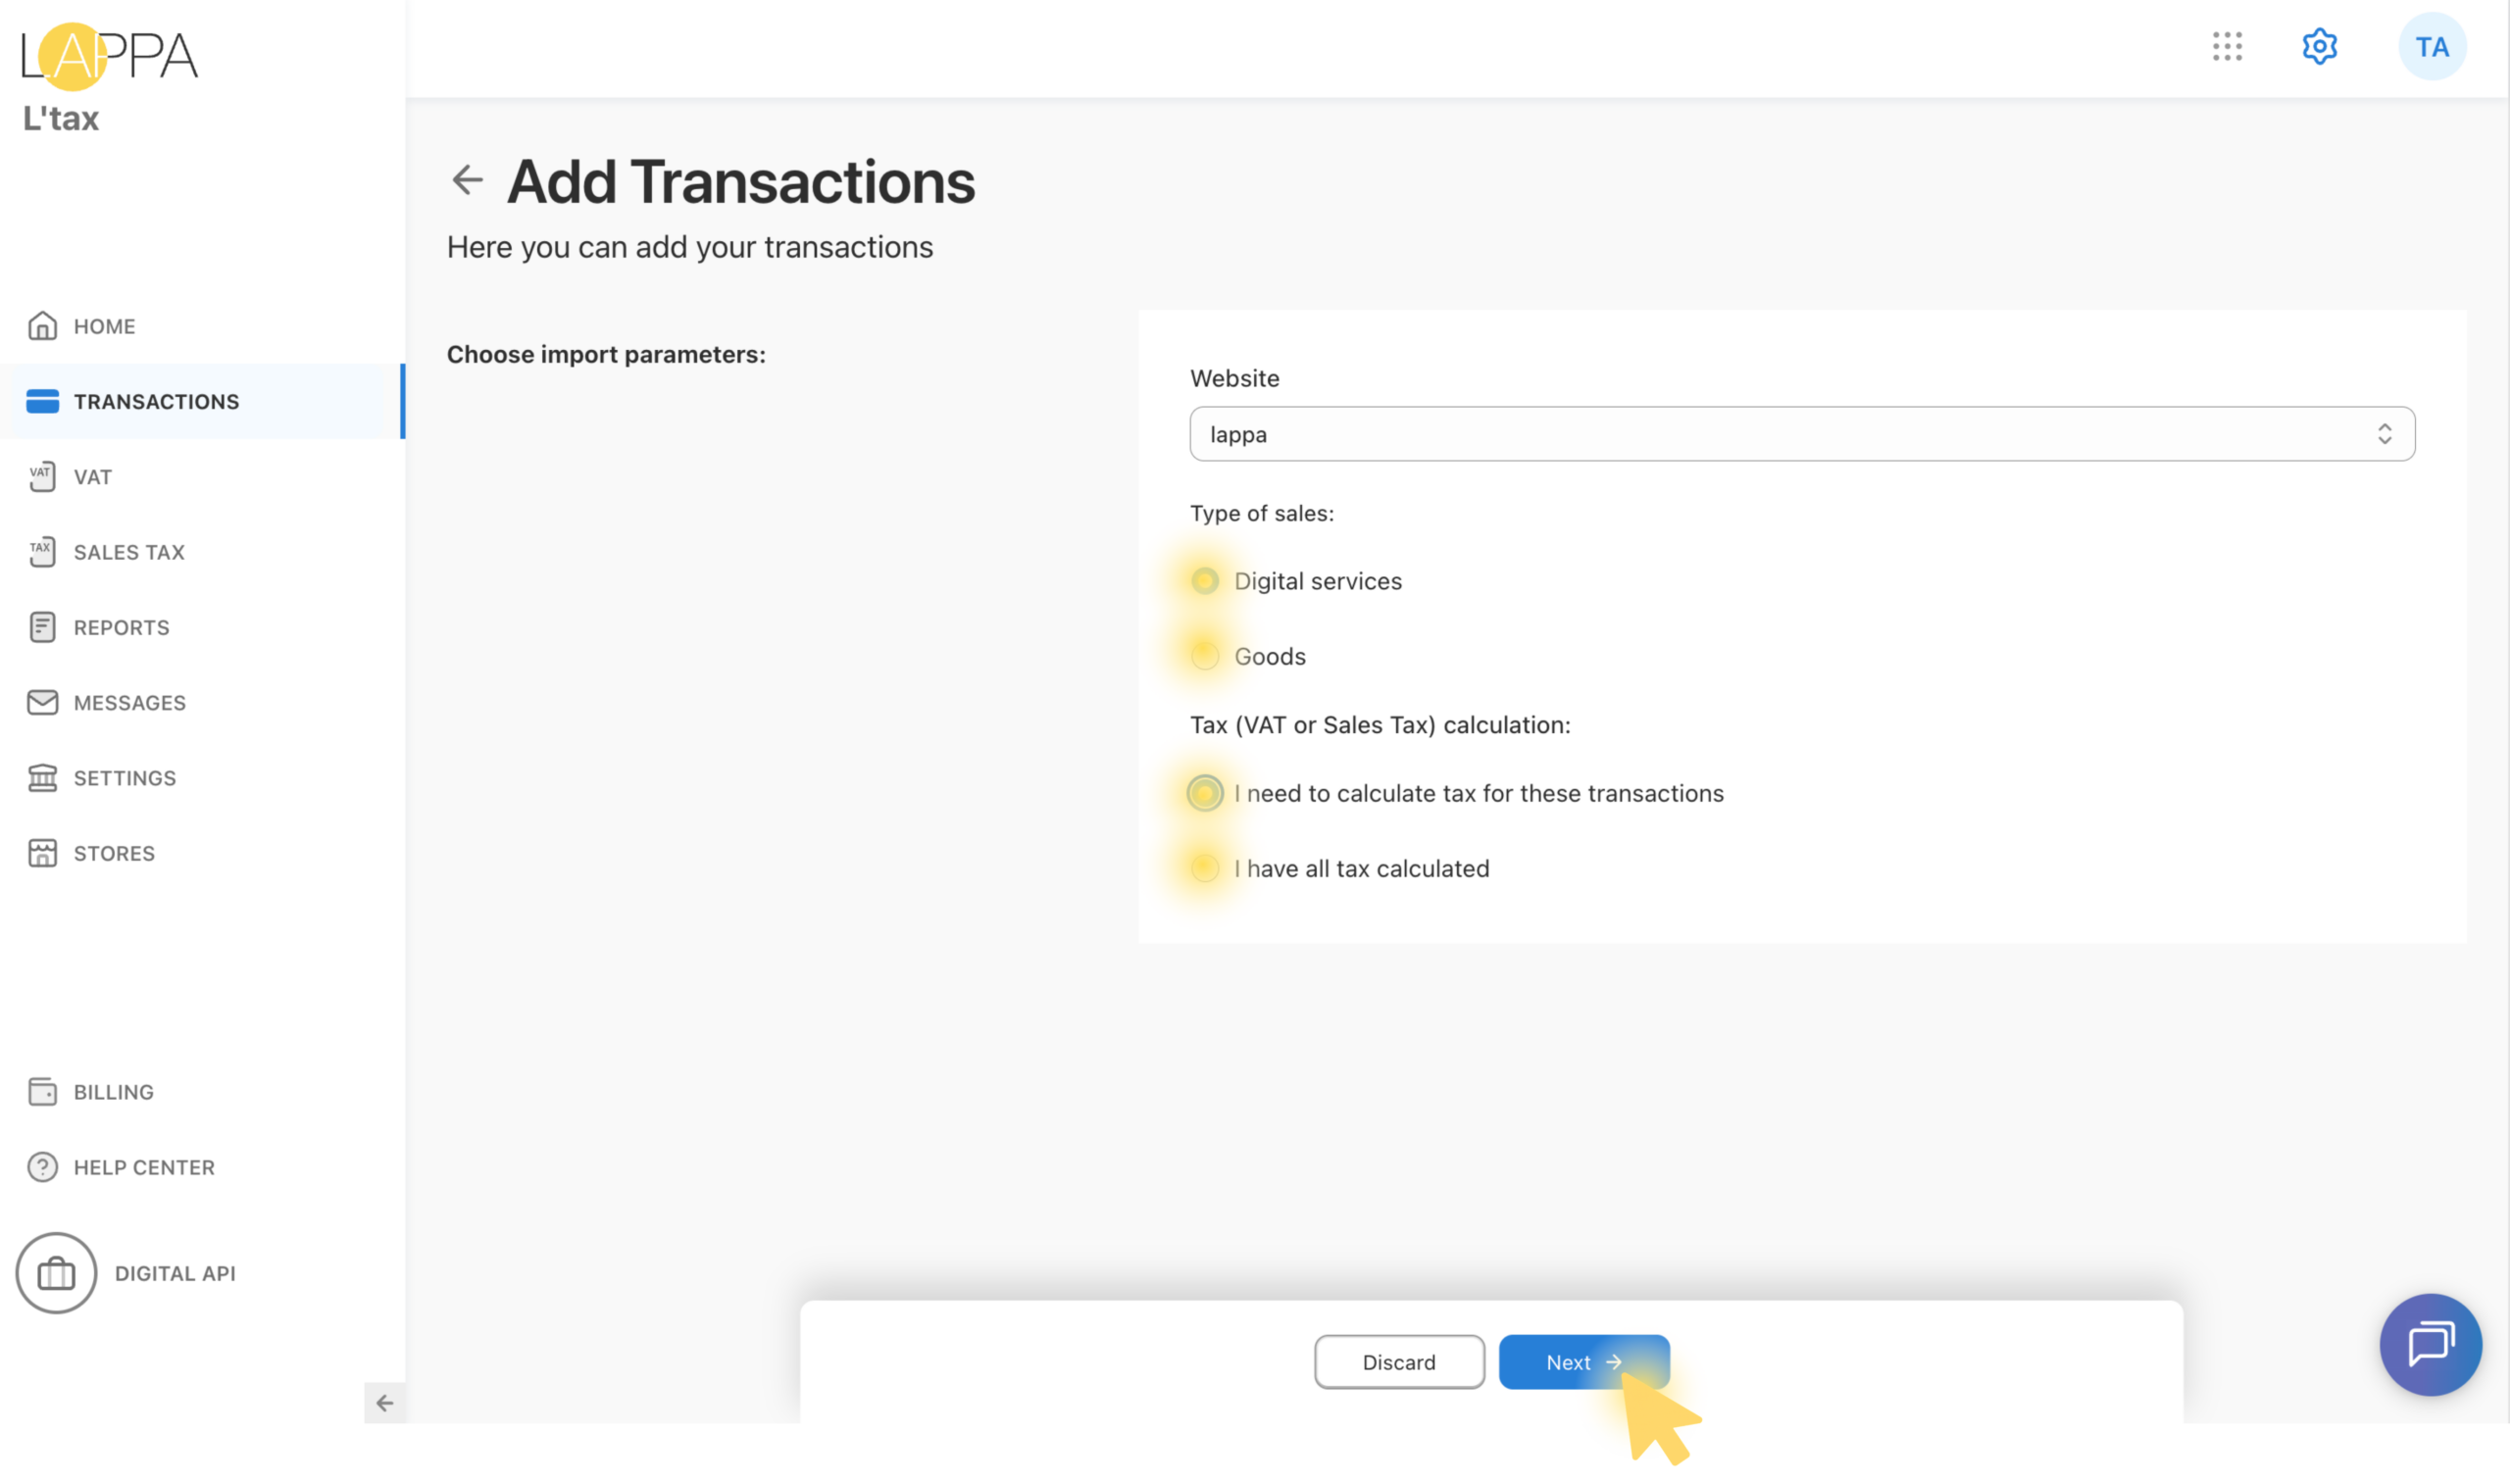
3.1 Choose import parameters
On the Add Transactions page, configure the following:
- Website — select the store you added in Step 1.
- Type of sales — choose either Digital services or Goods, depending on what you sell.
- Tax (VAT or Sales Tax) calculation — select one of the two options:
I need to calculate tax for these transactions — L’tax will automatically determine the applicable tax rate for each transaction.
I have all tax calculated — use this if your file already contains pre-calculated tax amounts.
3.2 Upload your transactions file
Click Add file and select your transactions spreadsheet. Only .xlsx and .xls files are accepted.
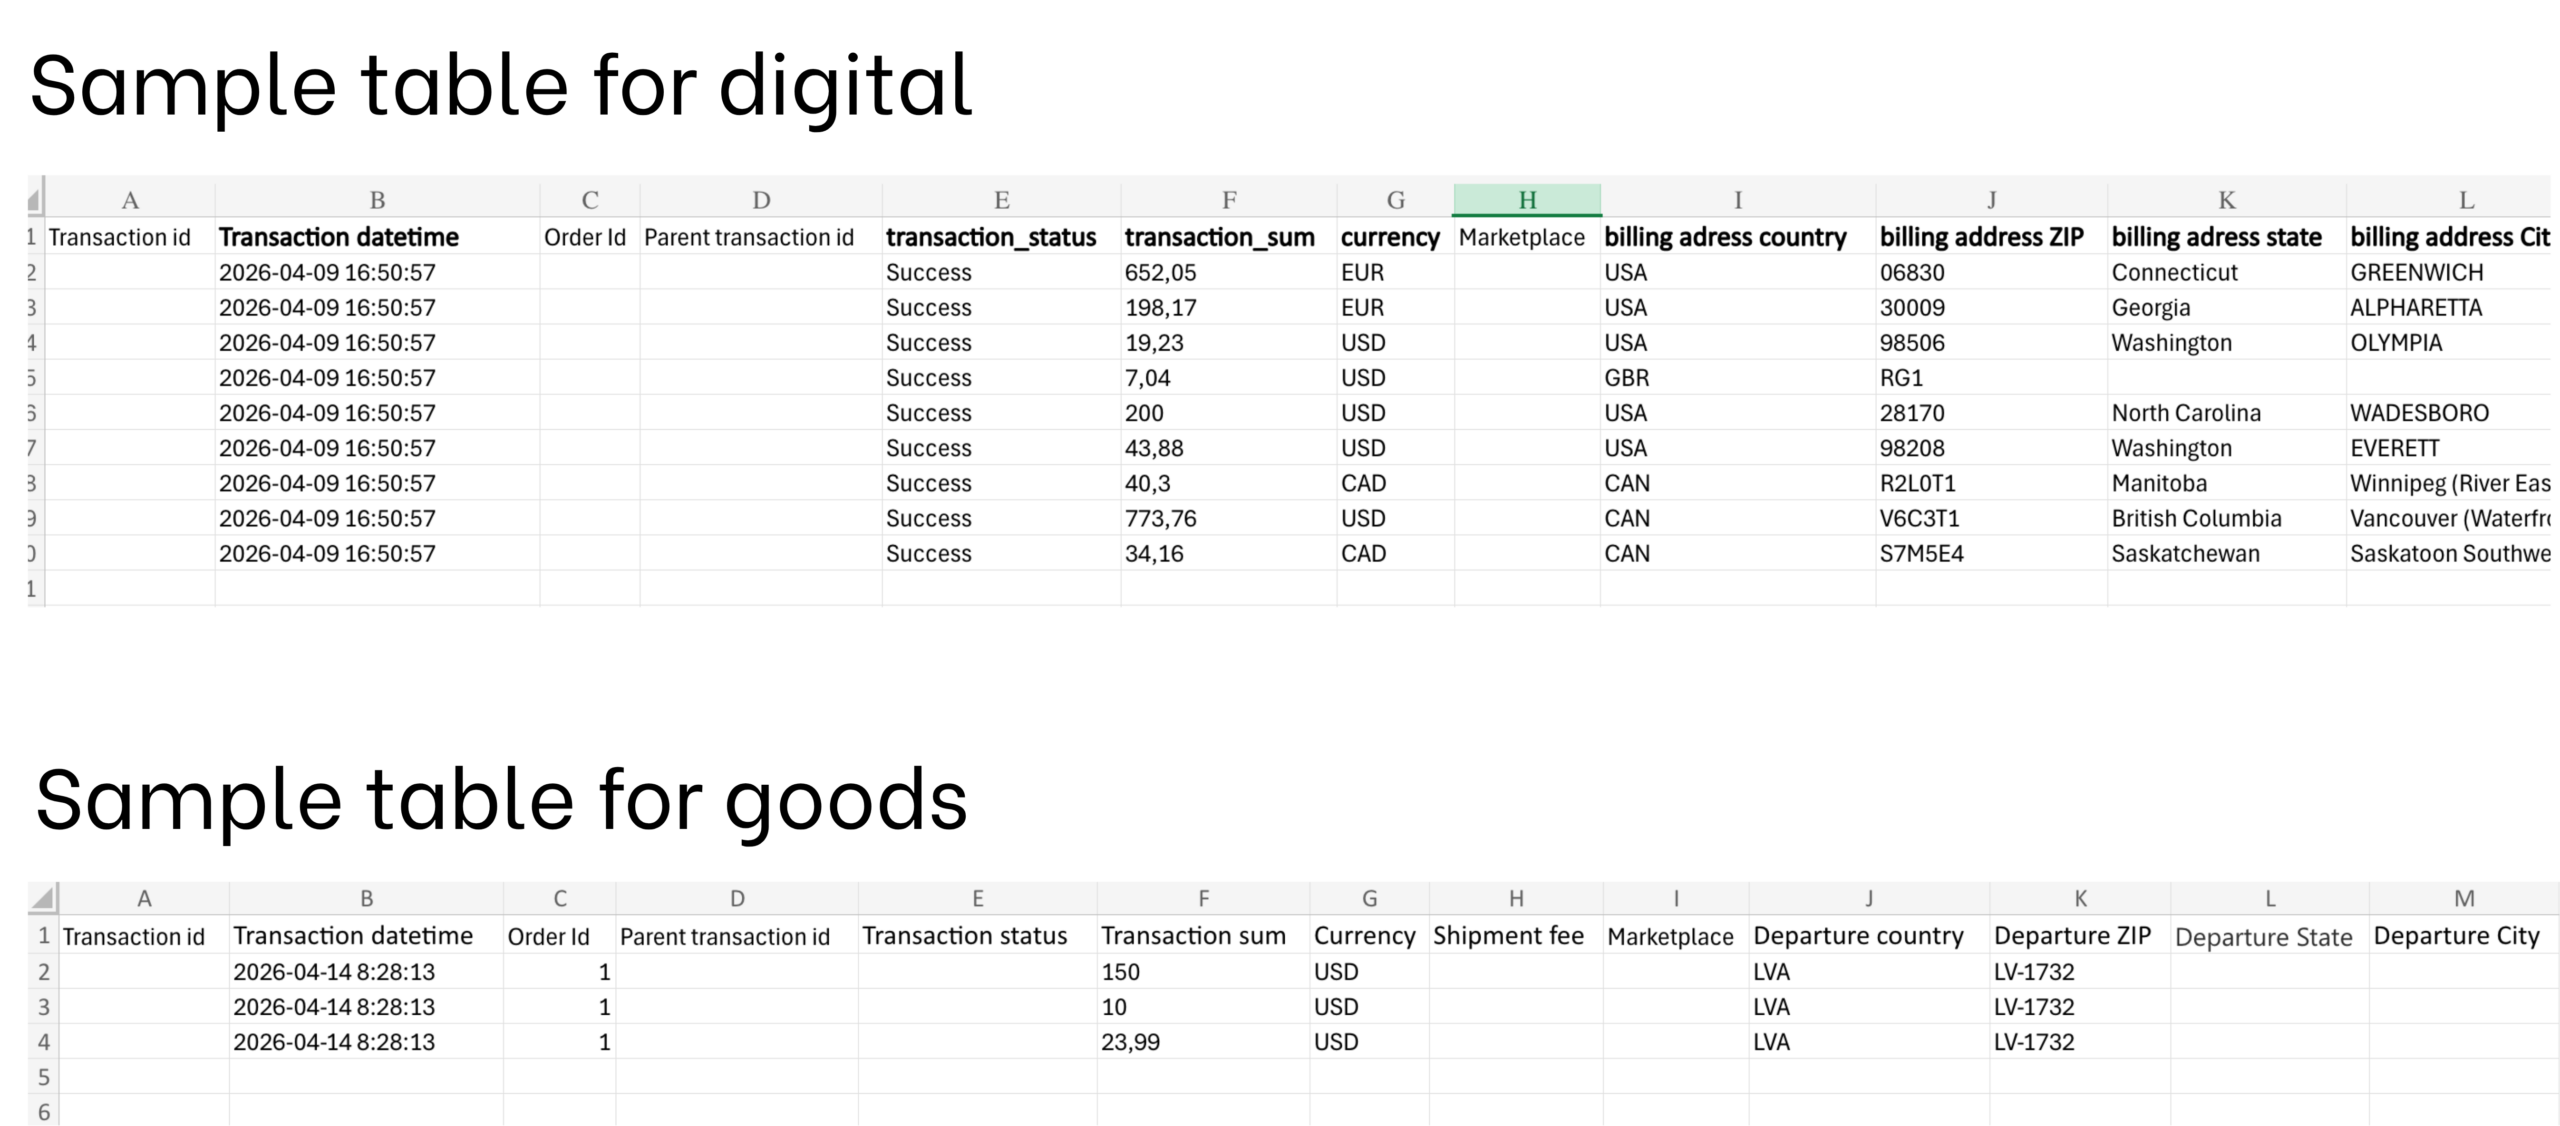
File format requirements: Your spreadsheet must be structured according to the platform’s column requirements. The required column layout is shown beneath the file upload area — review it carefully before uploading to ensure your file matches the expected format.
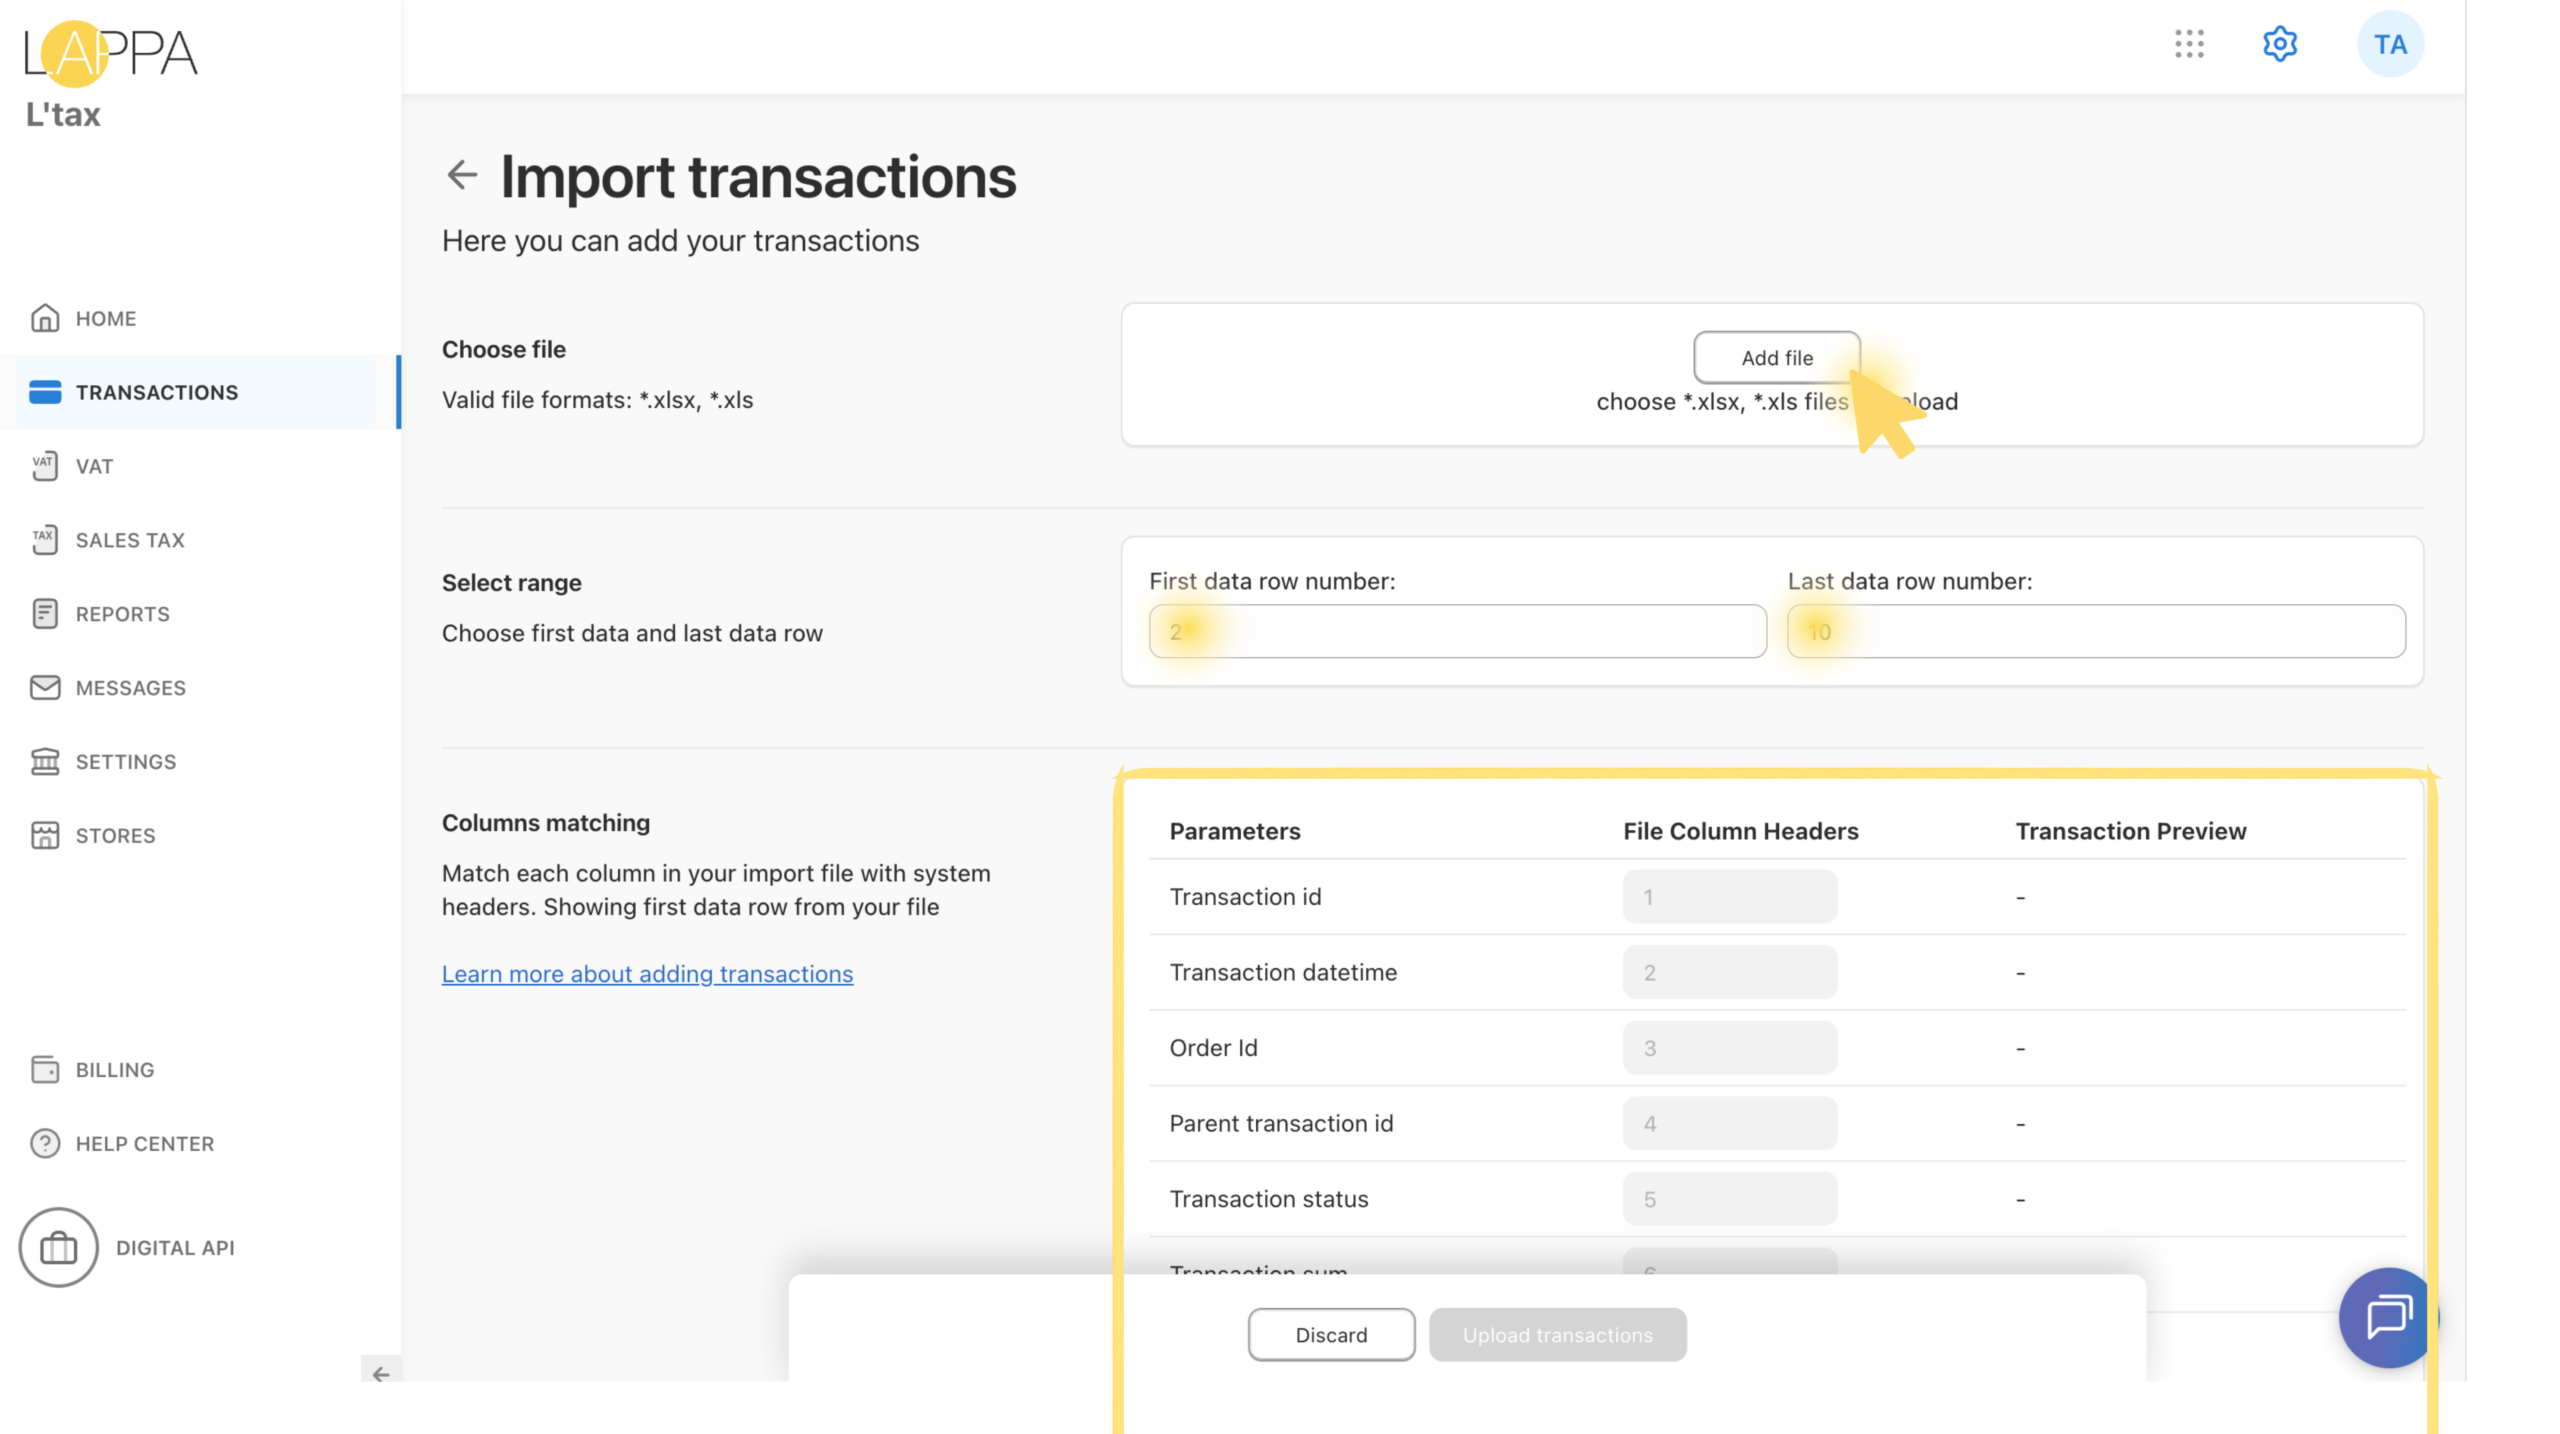
3.3 Set the data row range
After uploading the file, specify which rows contain transaction data:
- First data row number — typically 2 if row 1 is the header.
- Last data row number — the last row containing a transaction in your file.
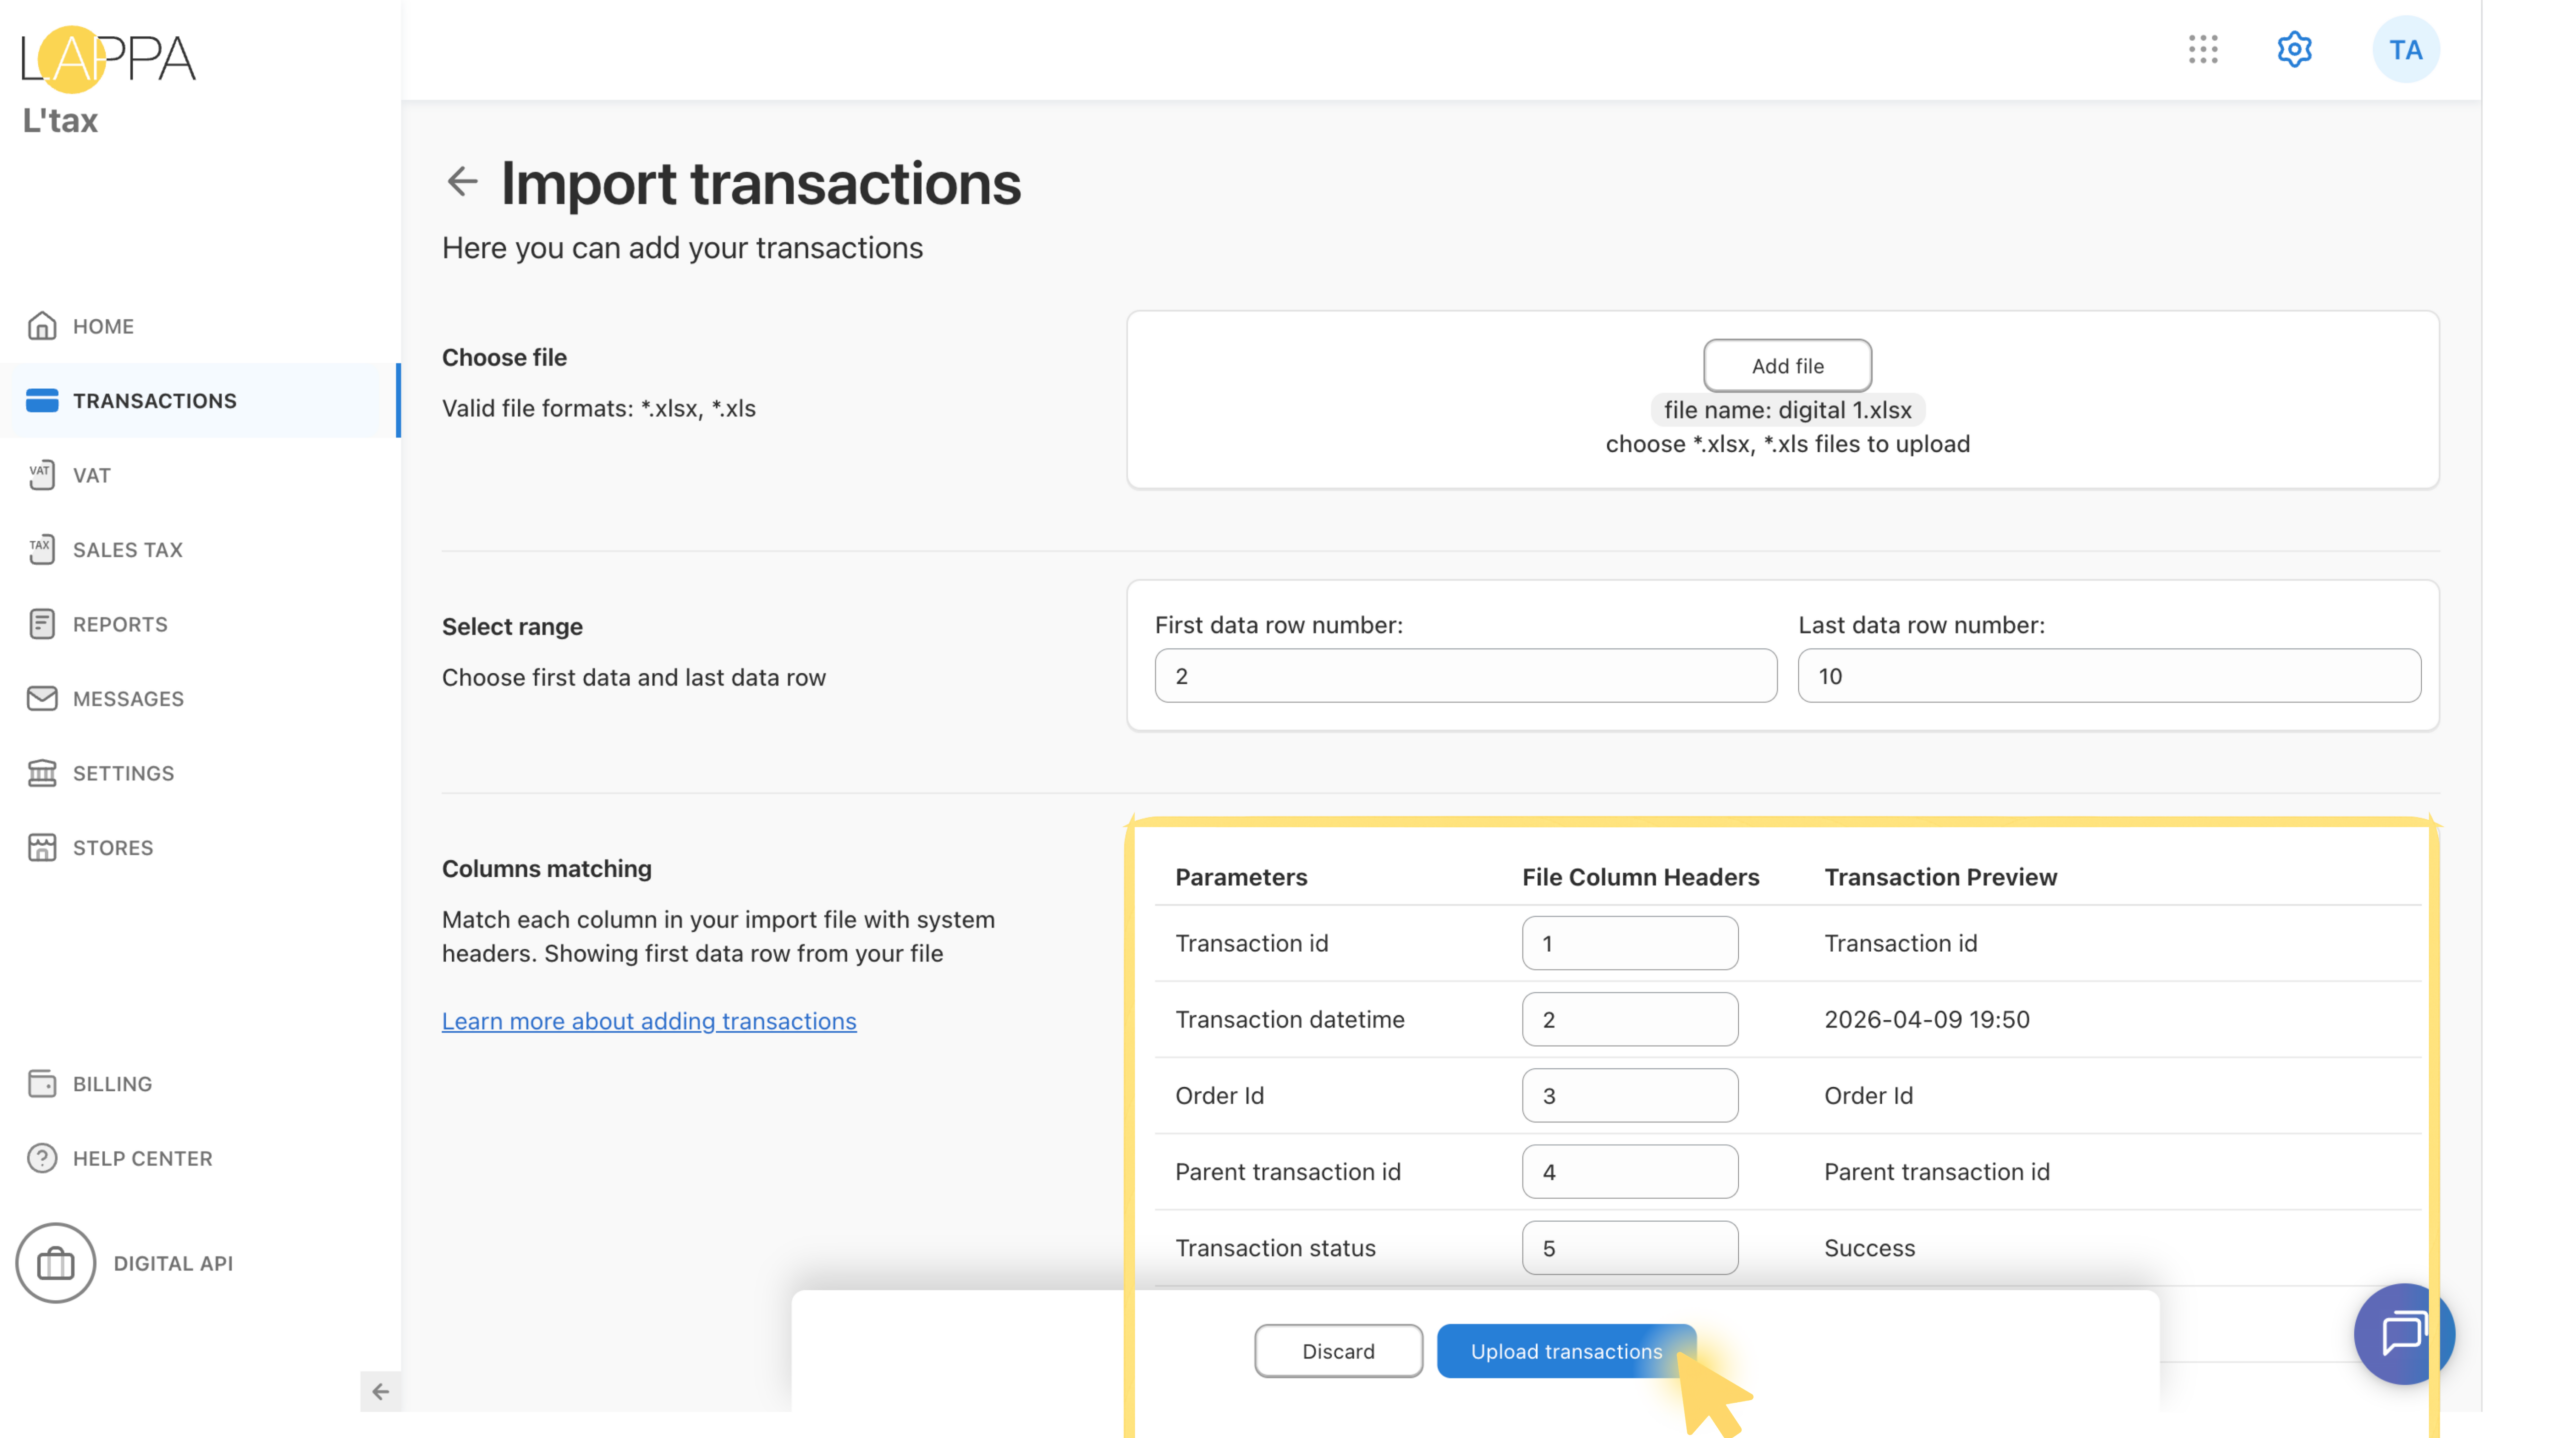
3.4 Map columns
The Columns matching section allows you to map each system parameter to the corresponding column number in your file. The Transaction Preview column shows the value from the first data row so you can verify the mapping is correct.
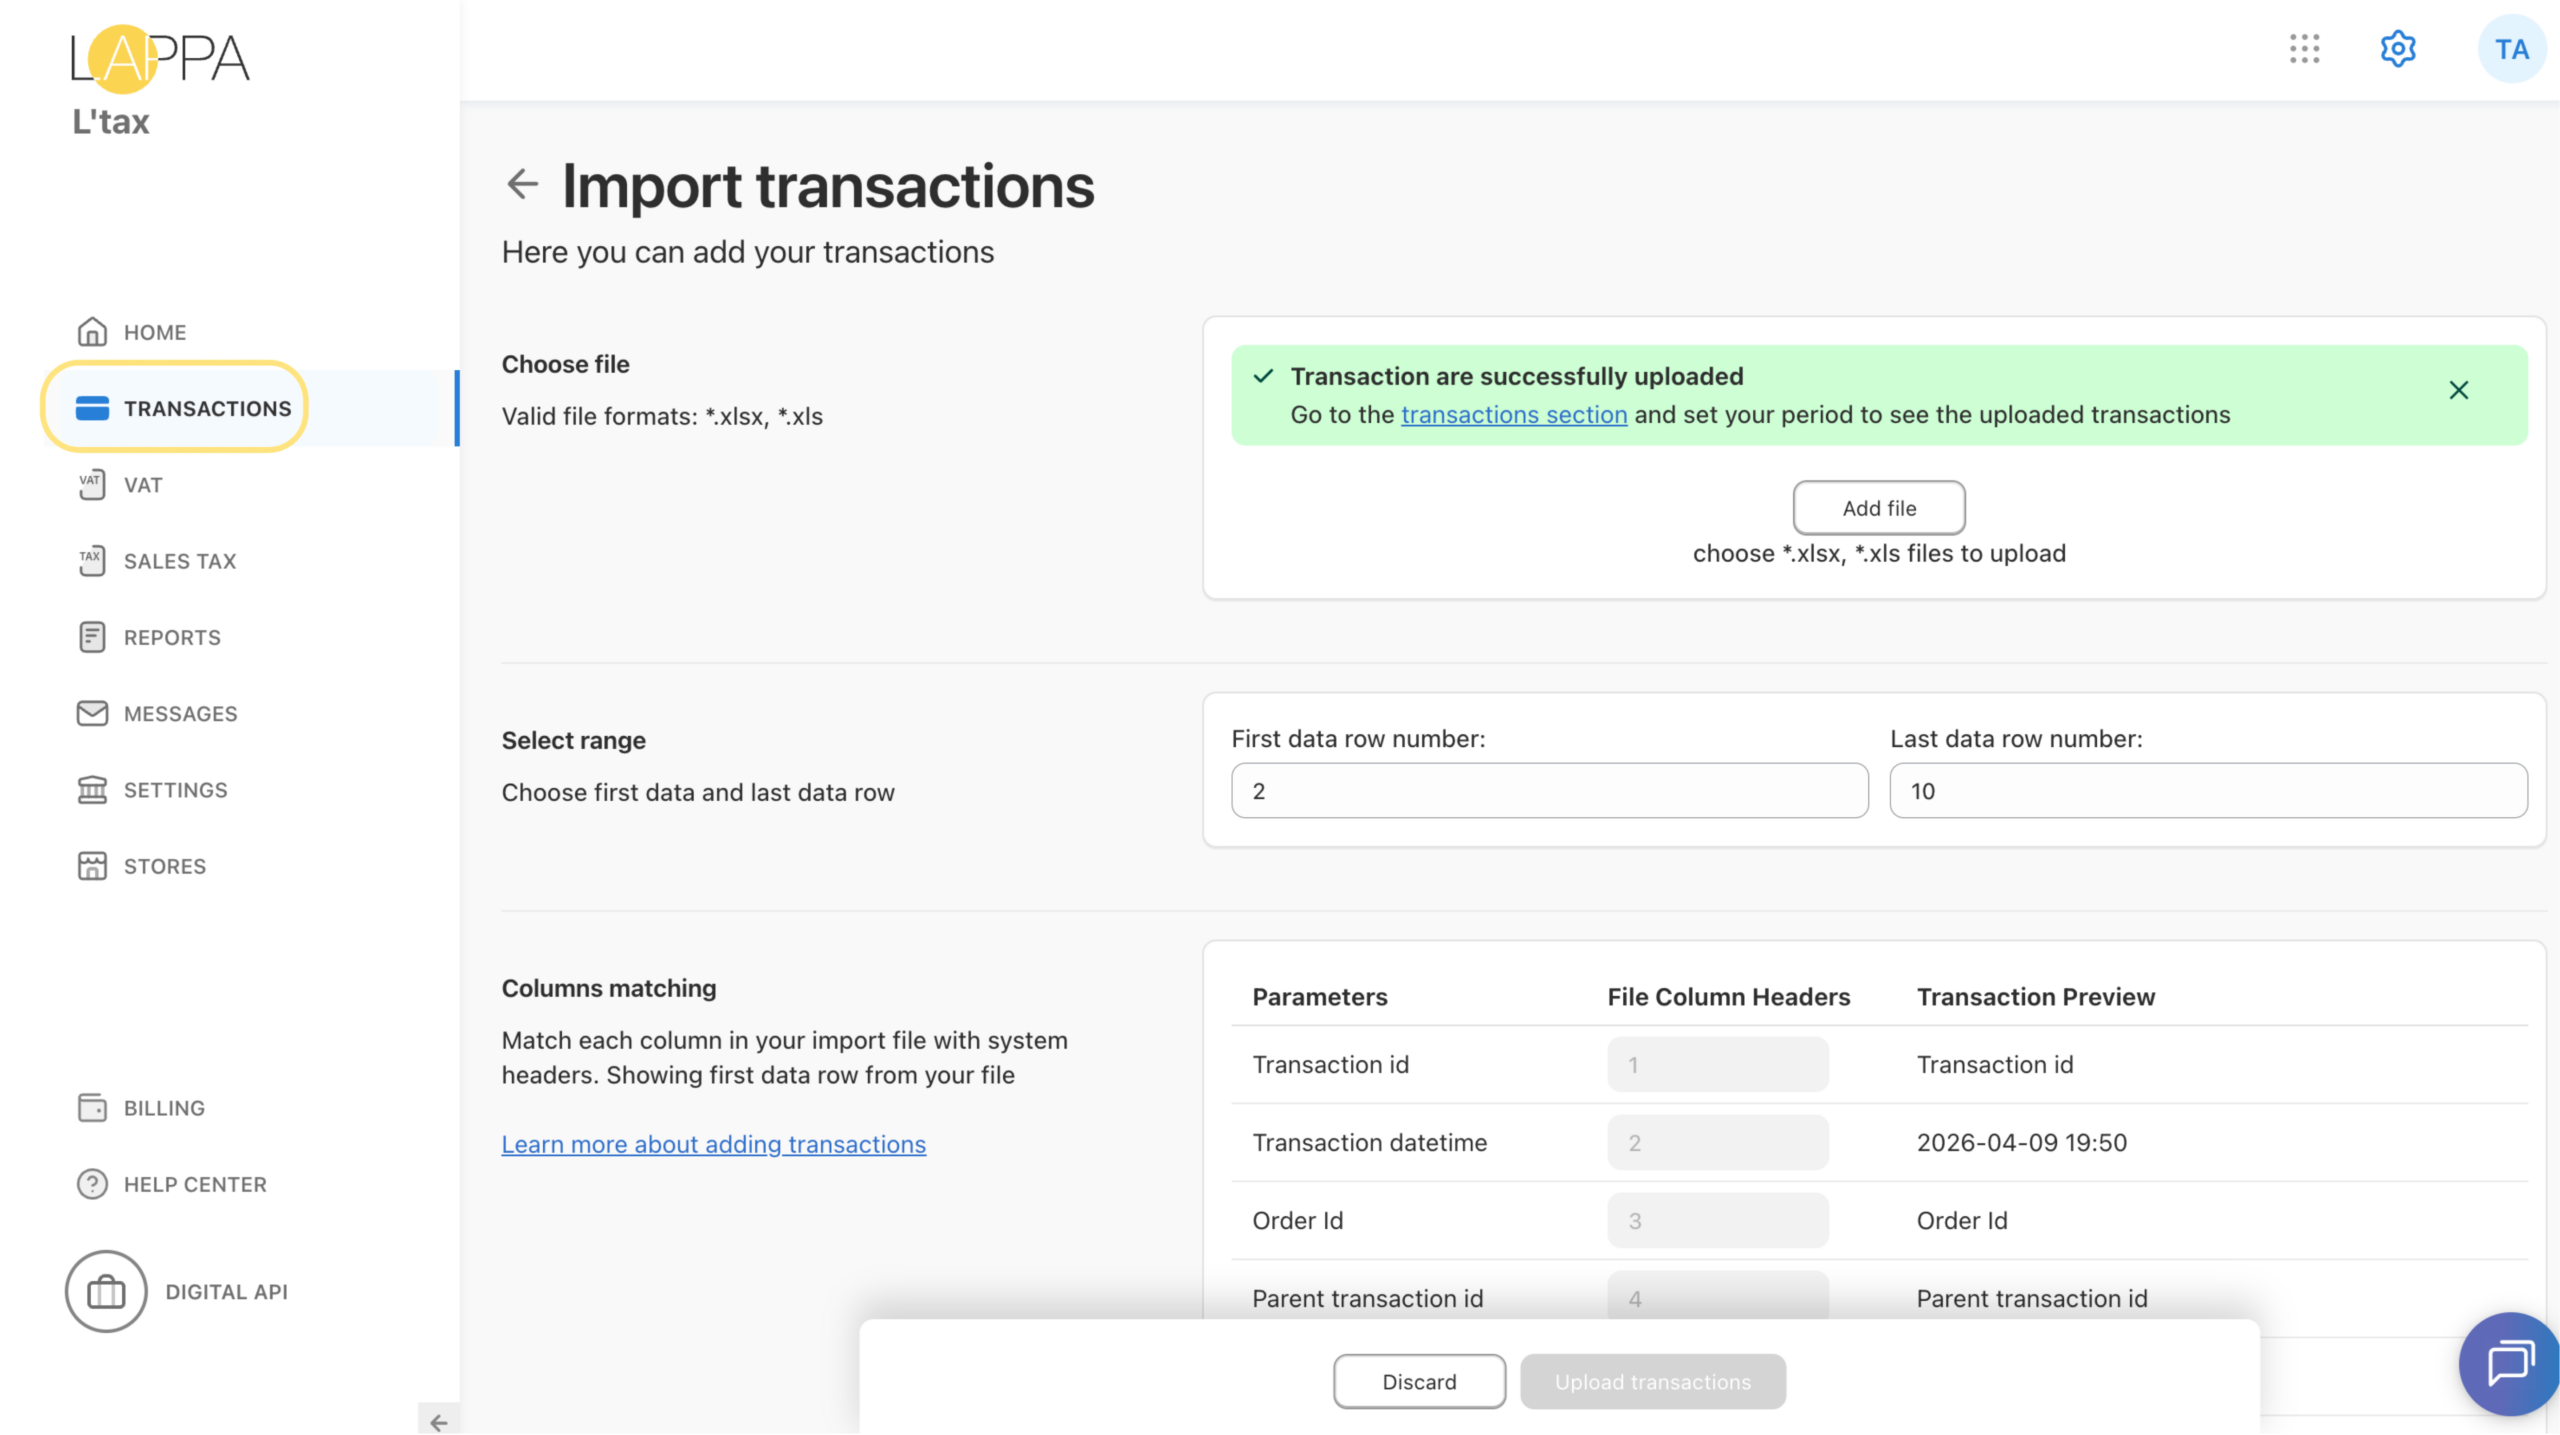
3.5 Upload and confirm
When all parameters and column mappings are set, click Upload Transactions at the bottom of the page. Wait for the confirmation message to appear:
✅ Transaction are successfully uploaded
Go to the transactions section and set your period to see the uploaded transactions.
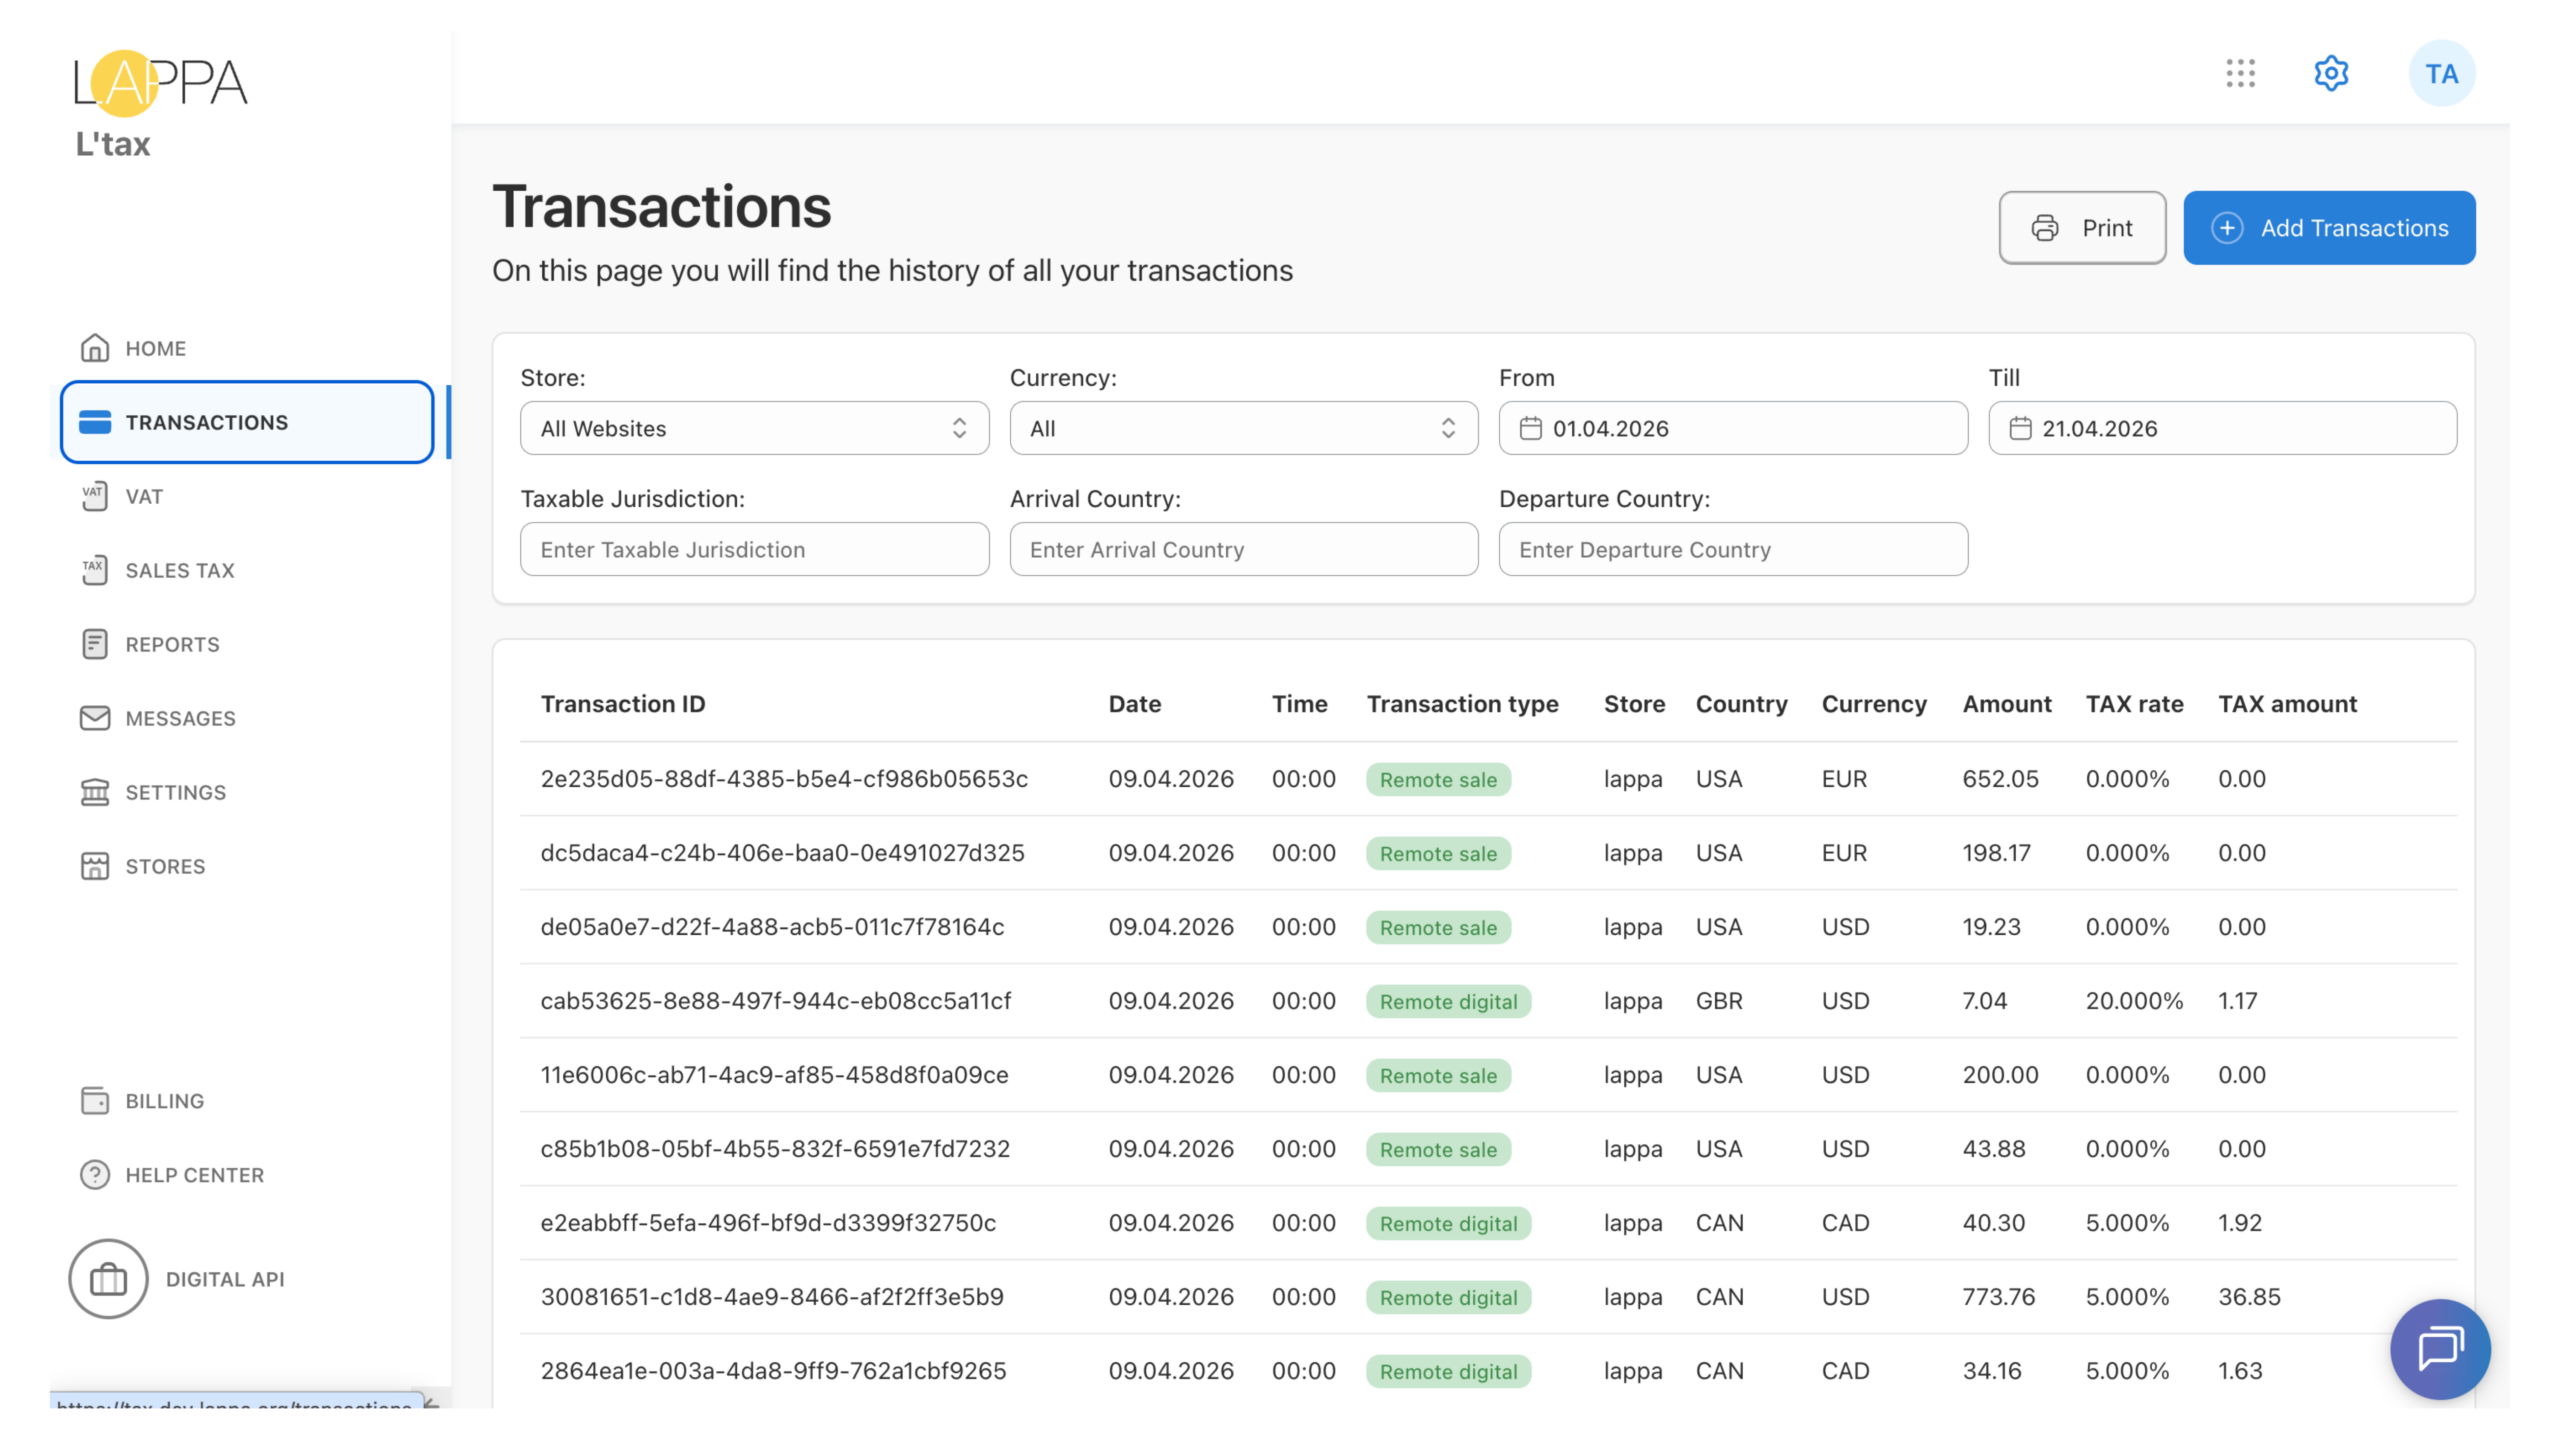
Viewing your imported transactions
Navigate to the Transactions section in the main menu. Your imported transactions will now appear in the list. Each row shows the Transaction ID, Date, Time, Transaction type (e.g. Remote sale), Store, Country, Currency, Amount, TAX rate, and TAX amount calculated by the platform.
Use the filters at the top — Store, Currency, From/Till dates, Arrival Country, and Departure Country — to narrow down the view to a specific period or market.
Still have questions?
Contact us at support@lappa.org